1975 IMSAI 8080 with 1981 Morrow 64K RAM
SHARE |
|
 1975 IMSAI 8080 with 1981 Morrow 64K RAM
 |
by Bill Degnan - 05/15/2023 22:51 |
 IMSAI 8080 running Jon Chapman's Glitchwrks GWROM-80 Intel 8080 ROM monitor program customized for the IMSAI 8080 and IMSAI SIO serial card. Click image for larger view.
The objective of this project is to build up an IMSAI with a usable ROM monitor program that can be used to load programs and manage RAM. The system should also provide access to most of the 64K address space, all while retaining the use of both the IMSAI front panel and/or a 9600b serial terminal. The use of a front panel is hightly valued for diagnostics, programming, and S-100 board hardware testing. Basically this will be my bench S-100 system. The challenge is to try to do all of this with a newer IEEE 696 RAM board. First gen S-100 systems like Altairs and IMSAIs are not fully compatible with the newer "IEEE 696" S-100 bus. Herb Johnson explains details of the evolution of the S-100 bus here: https://retrotechnology....erbs_stuff/s100bus.html 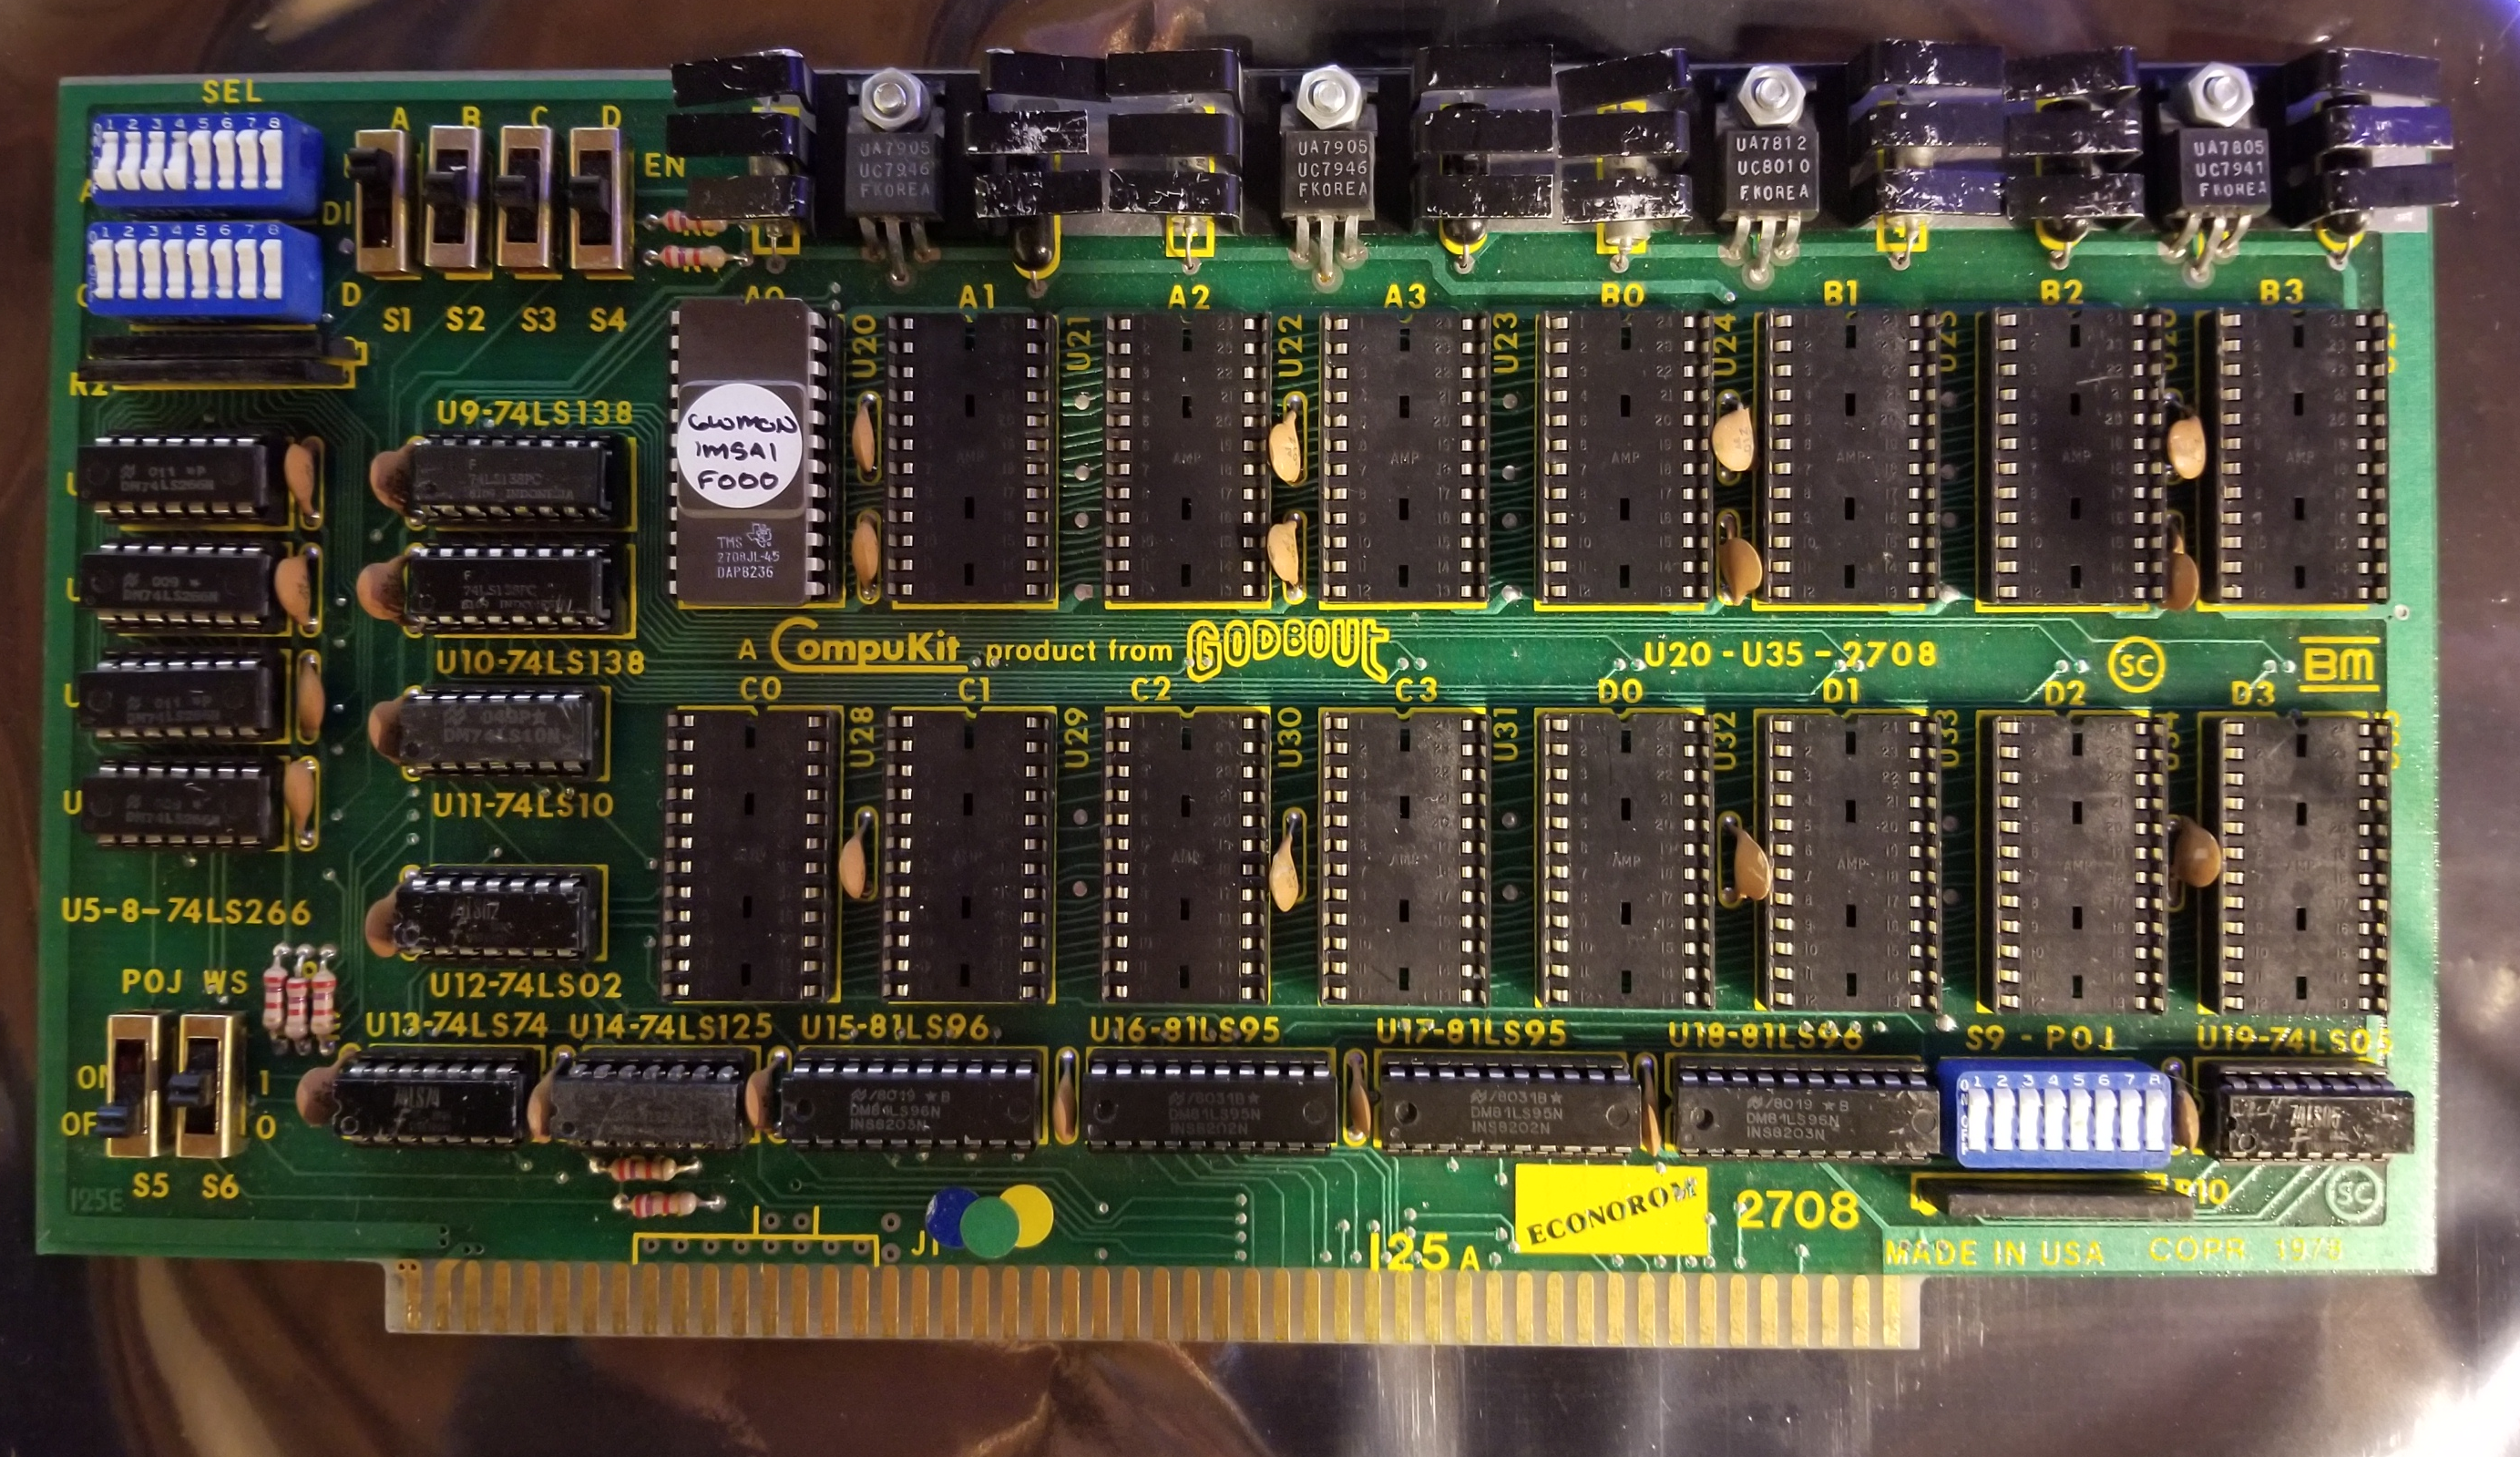 Compukit / Godbout ECONOROM 2708 eProm board. Click image for larger view.
Step one, select a suitable "monitor ROM" program compatible an IMSAI 8080 with original MPU and SIO Serial communications controller The ROM program will need to be be copied to a 2708 eProm and installed onto the ECONOROM board. The CompuKit/Godbout ECONOROM board has sockets for up to 16 2708 ePROMs, but only one is needed to hold the GW80 ROM program (F000-F1FF). Download the manual (link below). Note the switch settings on the board. The ROM requires the board to be set for F000 so the appropriate address jumpers are in place. PHANTOM is disabled so the front panel will still operate while the board is installed in the system. Only the BLOCK A is enabled and set to F000 address space. All other blocks are switched off (switch in center positon) and set to 0000 to help avoid electrical conflicts. Jon Chapman has a good eye for how to build a practical ROM monitor for an S-100 system, and I like how it's placed up in the F000 range, which usually is not going to cause conflicts with other programs. Running from F000 allows for a nice large available address space between 0000 and EFFF. GWROM-80 requires 256 bytes or more of RAM from EF00-EFFF for use by the program. The Small Monitor (SM) command syntax is as follows: D XXXX YYYY Dump memory from XXXX to YYYY E XXXX Edit memory starting at XXXX (CTRL+C to end) G XXXX GO starting at address XXXX I XX Input from I/O port XX and display as hex O XX YY Output to I/O port XX byte YY L Load an Intel HEX file into memory GWROM-80: https://github.com/glitchwrks/gwmon-80#readme ECONOROM Manual Download HINT: First make sure you can read the contents of the ROM BEFORE you install the RAM board. Test with the CPU and ROM board only, using the front panel. You should NOT be able to deposit to any addresses on the bus, but you should be able to see the ROM from F000 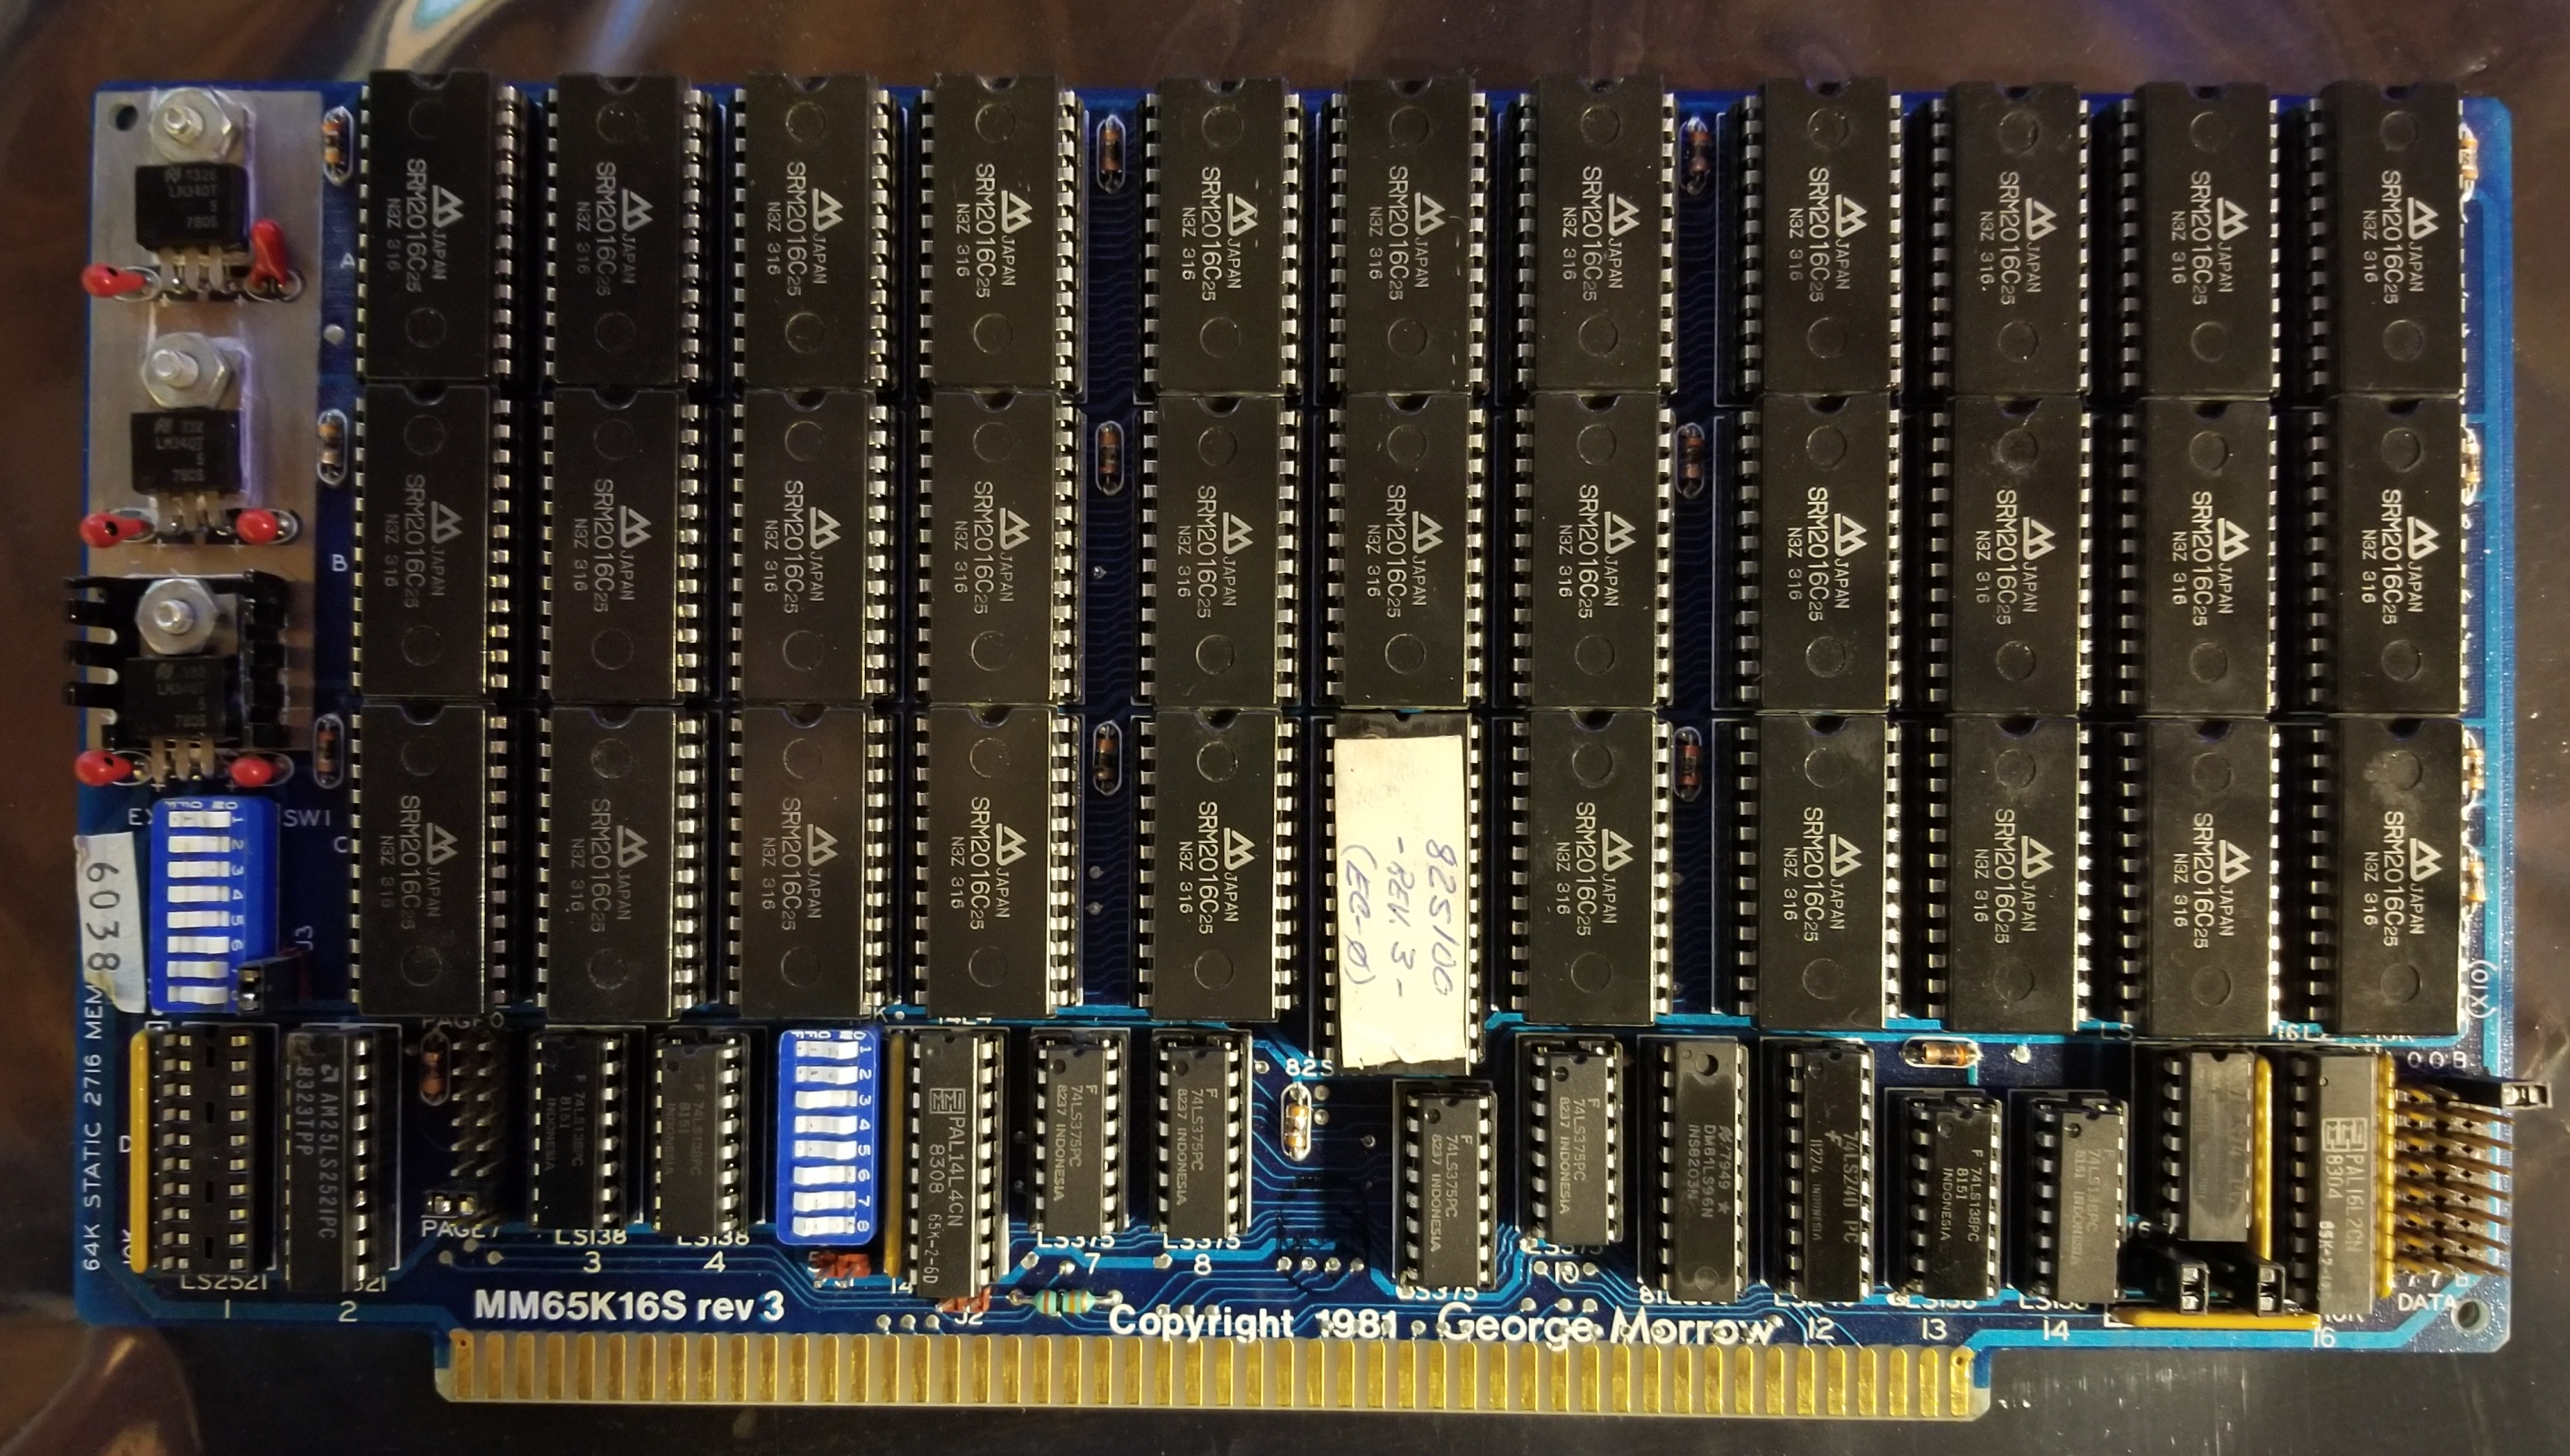 The George Morrow MM65K 64K S-100 RAM controller (1981). As you see here, the jumpers and switches are set to be compatible with an IMSAI 8080 front panel system. Click image for larger view.
This board is a typical newer IEEE 696 S-100 RAM and is ~6 or 7 years newer than the IMSAI 8080. The newer S-100 boards are more reliable than older RAM boards, which makes it worth the effort to try to get them to work on the older systems if possible. Otherwise to get a full 64K one might need a stack of 4 noisy 16K RAM boards or a mishmash of boards that have to be strapped to fill address spaces in sequence. IEEE 696 RAM is not by default compatible with an IMSAI front panel, some adjustments would be necessary. Manual link below. To Use the Morrow MM65K 64K RAM board in a First-Gen S-100 System with a Front Panel (IMSAI/Altair): 1) Disable RAM board's Phantom signal that disrupts the IMSAI's front panel use. Phantom is related memory management. 2) Remove any conflicts with other controllers such as the ECONOROM board / ePROM in F000-F1FF 3) Otherwise attempt to make available as much of the RAM space from 0000 - EFFF, and F800-FFFF as possible. I won't go into all of the details, but it took a thorough review and understanding of the jumpers described in the manual. The special sauce of this particular RAM board is that it's designed to allow a 2K segment to be disabled (ignored by the system) to allow for ROMs to exist wherever they're needed. 2K is more than is actually needed given GWROM-80 stats at F000 and ends at F1FF. Thus, F200 through F4FF is "wasted space" (the remainder of the 2K after the ROM). On the bright side iwith this space one could install three more ROMS for future expansion :-) HINT: Test writing to each page of memory using the front panel with the RAM board and MPU installed only. Then repeat with the ROM board installed and the RAM board. Other than the the 2K block used by the ROM board the test of RAM should be write-able from the front panel. If it's not, you have a bus conflict, assuming the boards are working correctly otherwise Morrow Designs MM65K Memory Board User's Manual Download 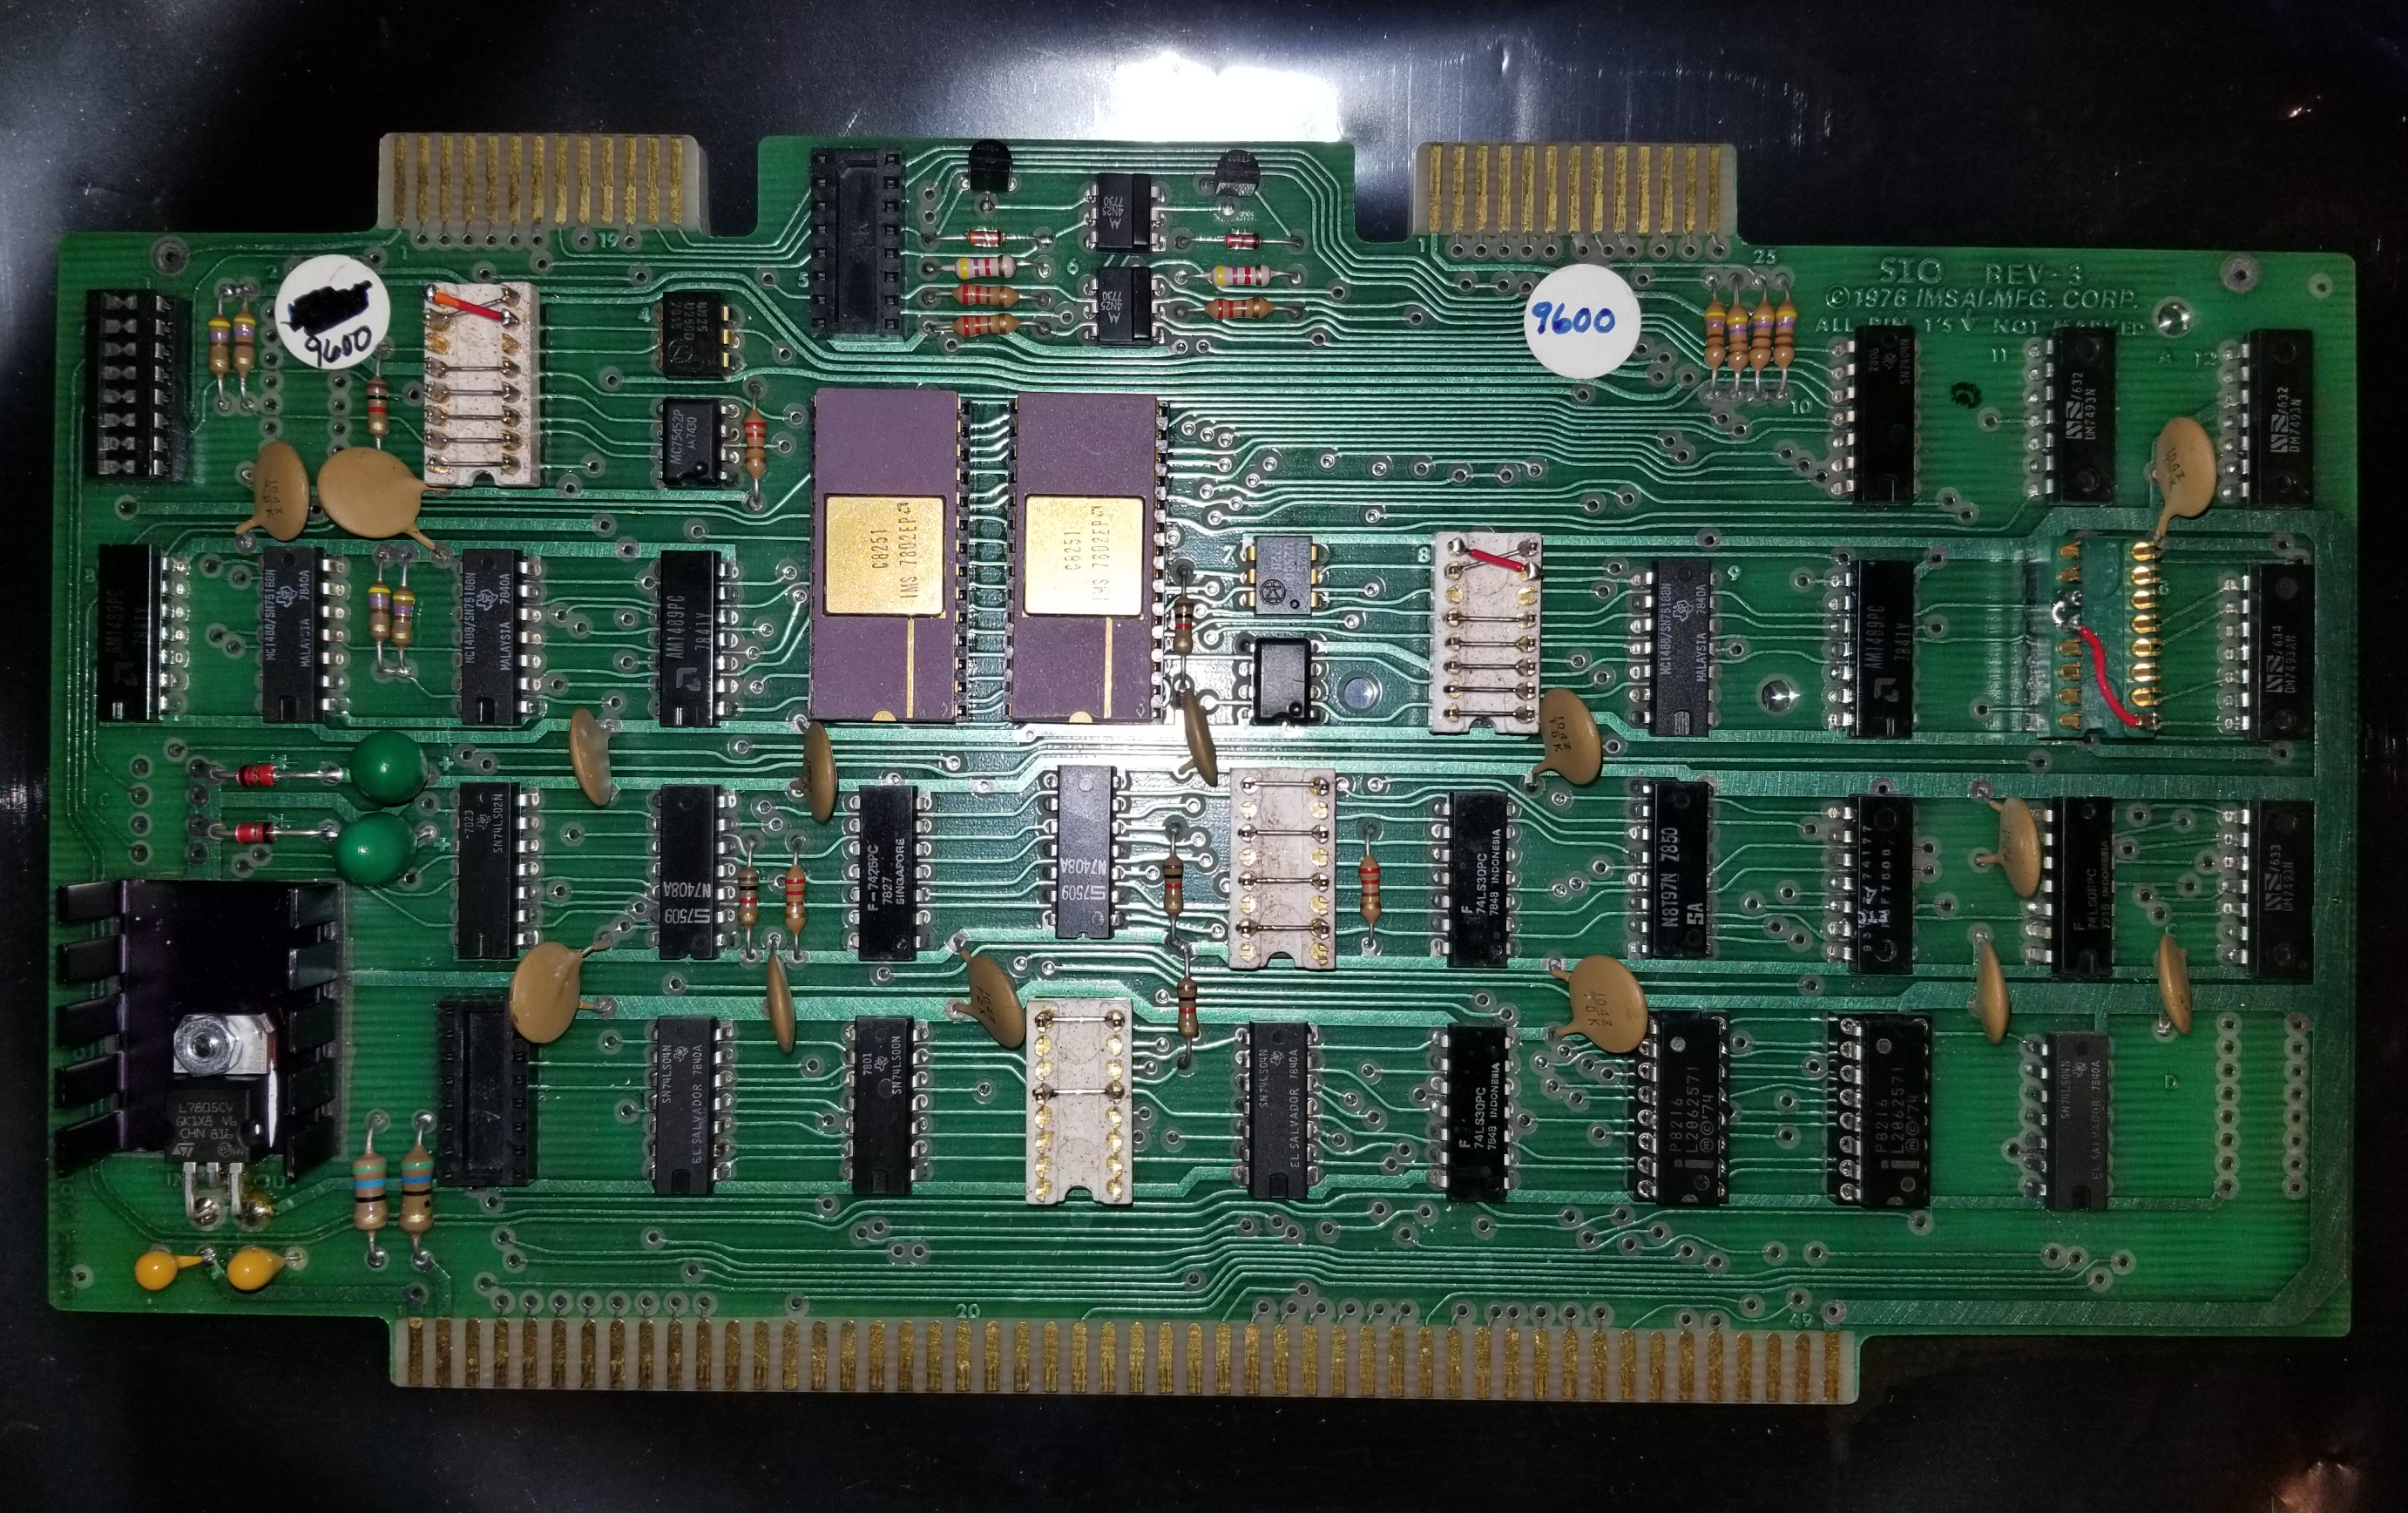 IMSAI SIO Serial board. The left channel is the console channel. No null modem required. Note jumpers are for 9600b. Serial port 1/A uses ports 2/3 and 2/B ports are 4/5.
Click image for larger view. 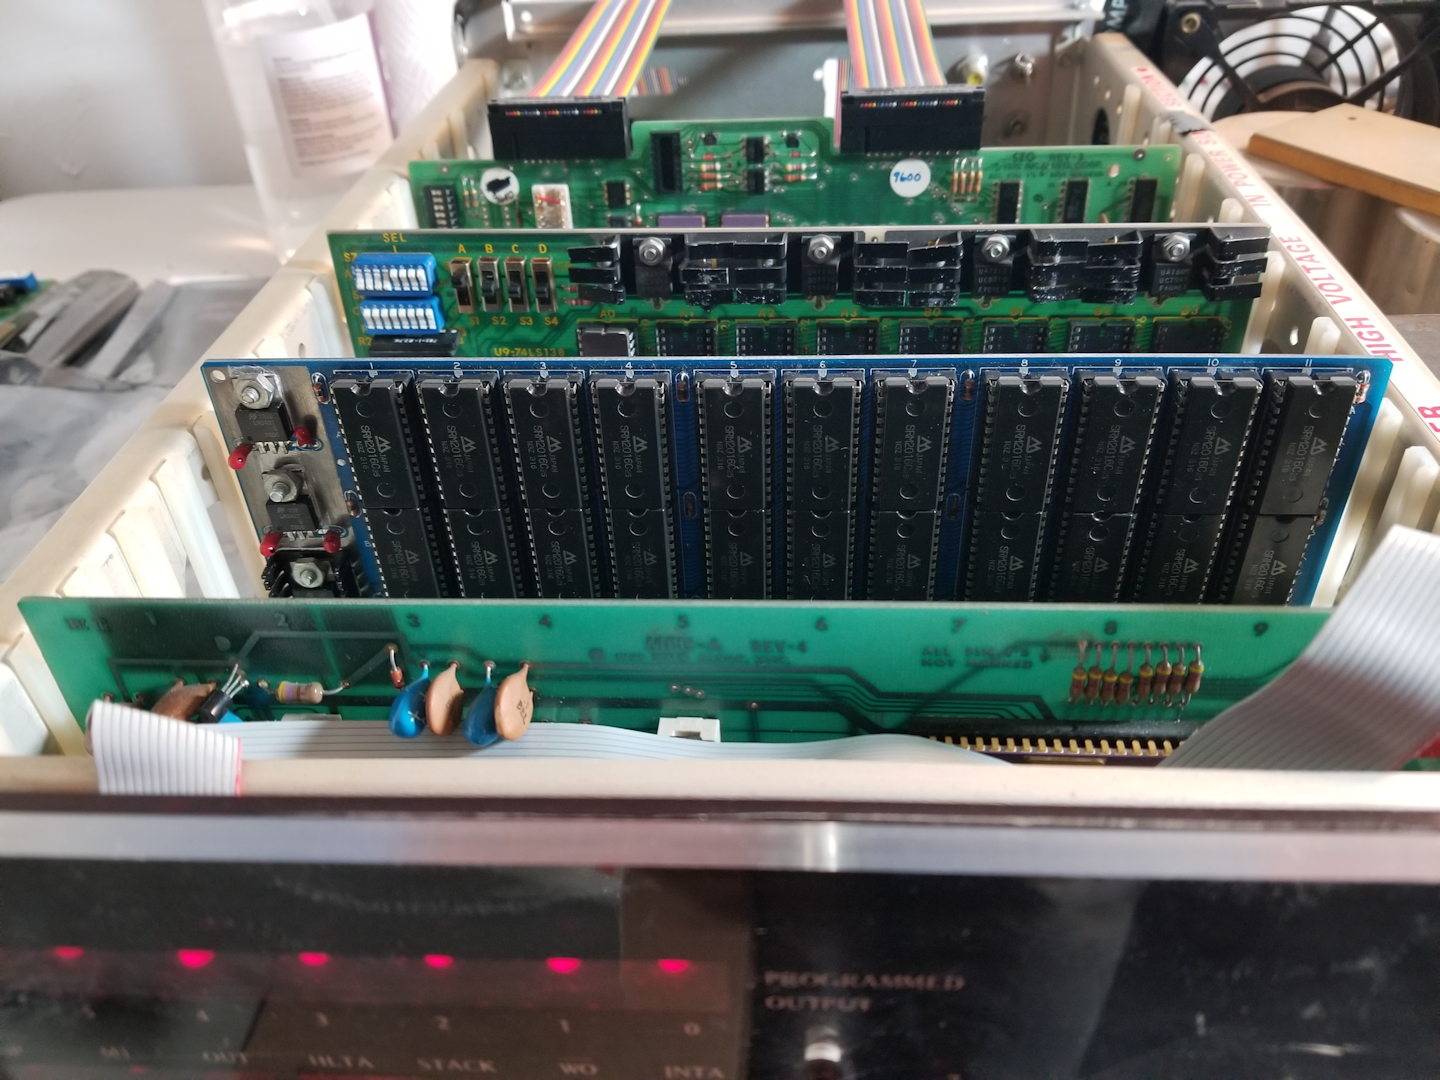 Controllers installed. The foreground controller is an IMSAI MPU-A rev 4. Click image for larger view.
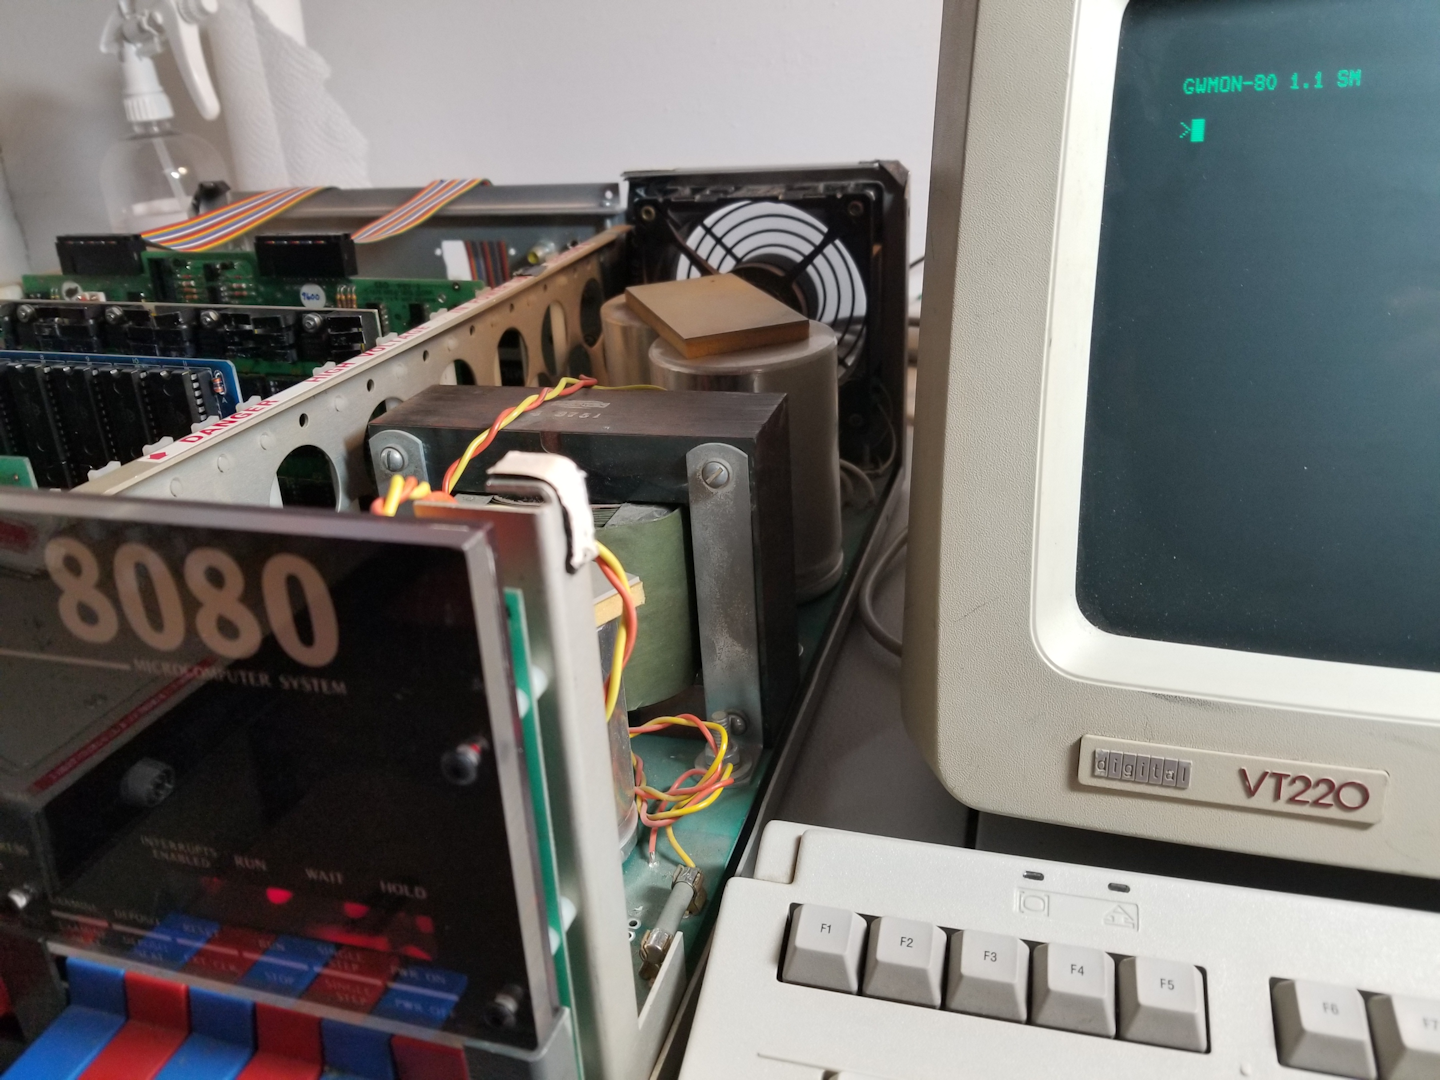
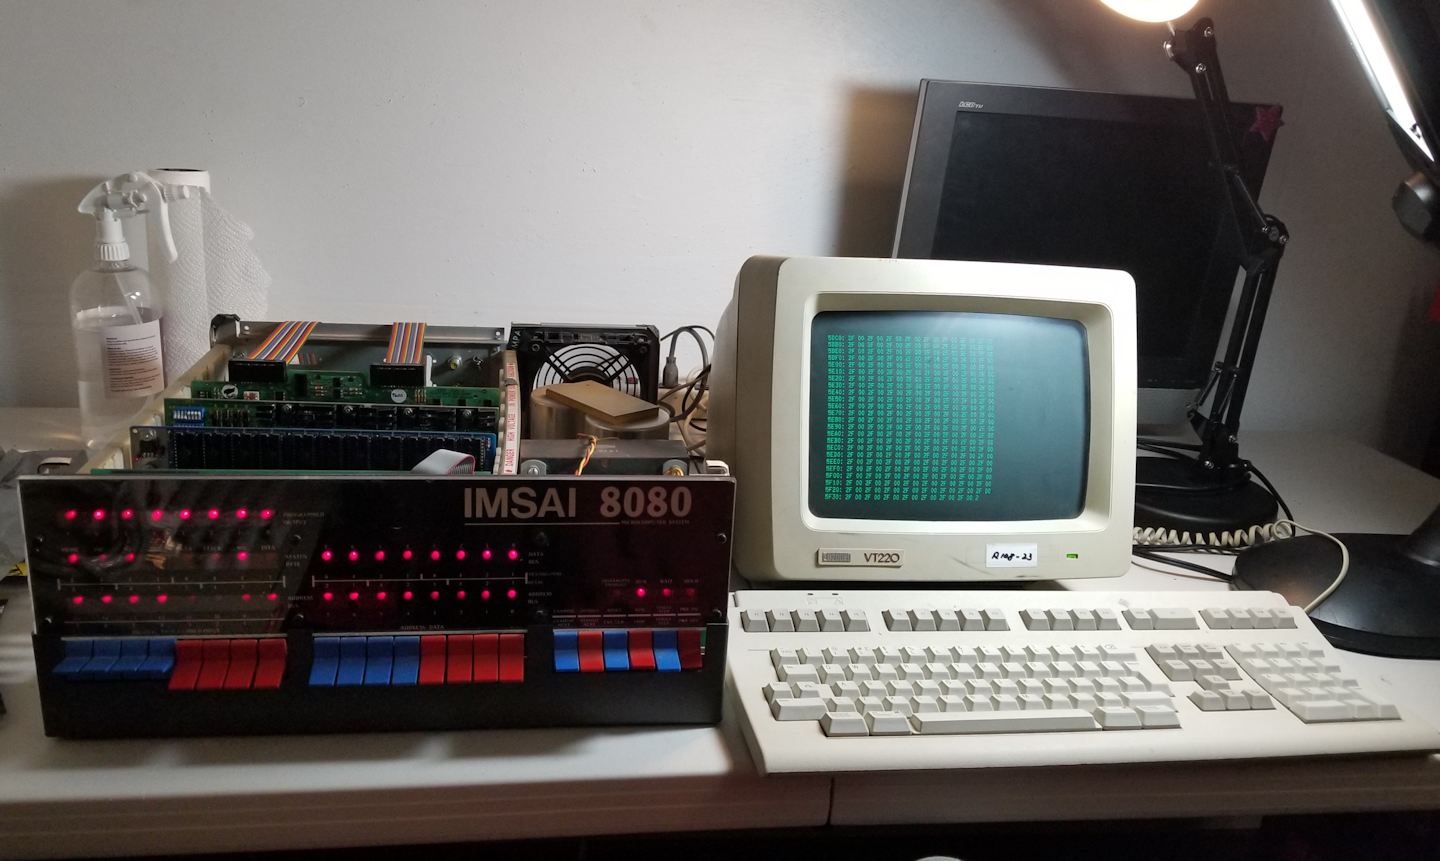 IMSAI 8080 with DEC VT220 set for 9600 baud. The second serial port can be used for wifi modem communications. To get started; STOP the system. Flip up the left-most 4 switches only. Hit Examime. Run. The GWROM-80 monitor prompt should appear on the terminal. Click image for larger view.
 Paused RAM dump shows the contents of RAM after the system has been set up. Click image for larger view.
Reply |
|
 Loading Imsai BASIC
 |
by Bill Degnan - 07/04/2023 18:12 |
|
Directions for loading IMSAI BASIC (4K or 8K) on a stock S-100 system with Imsai SIO serial card (or equivalent using default SIO ports).
Download BASIC Here 1. Start your system ROM monitor program connected to a PC as your terminal (using TeraTerm or equivalent), and run the tape load command. Usually the tape load command is "L" but consult your ROM monitor manual to confirm. Now your IMSAI is ready to receive the download of BASIC through the serial connection. 2. From your terminal software, send the BASIC .HEX file of choice from the ZIP file link above. Send as a "binary" file (not text/ascii) and add a character transmit delay of 10ms or more to ensure the IMSAI can process the download without error. 3. Watch the download transmit from the PC. Eventually you'll see the BASIC papertape data stream on the terminal screen. Watch for error messages. 4. If you're downloading the 8K version your machine needs 8K to be available as the papertape fills up to address 1FE2, which is nearly the top of 8K (1FFF). BASIC programs are saved from 2000 hex and higher. 5. When the download completes you'll be returned to the ROM monitor prompt. 6. Stop the CPU and change your terminal software to communicate 7N1. 7. Toggle to address 0000, examine, and run. If the download worked, you'll be greeted by a BASIC prompt. Reply |
|
Resources:

Popular Topics and FAQs
Past Issues:
CPM diskdirectory
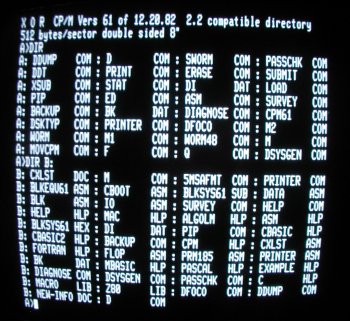
This image was selected at random from the archive. Click image for more photos and files from this set.