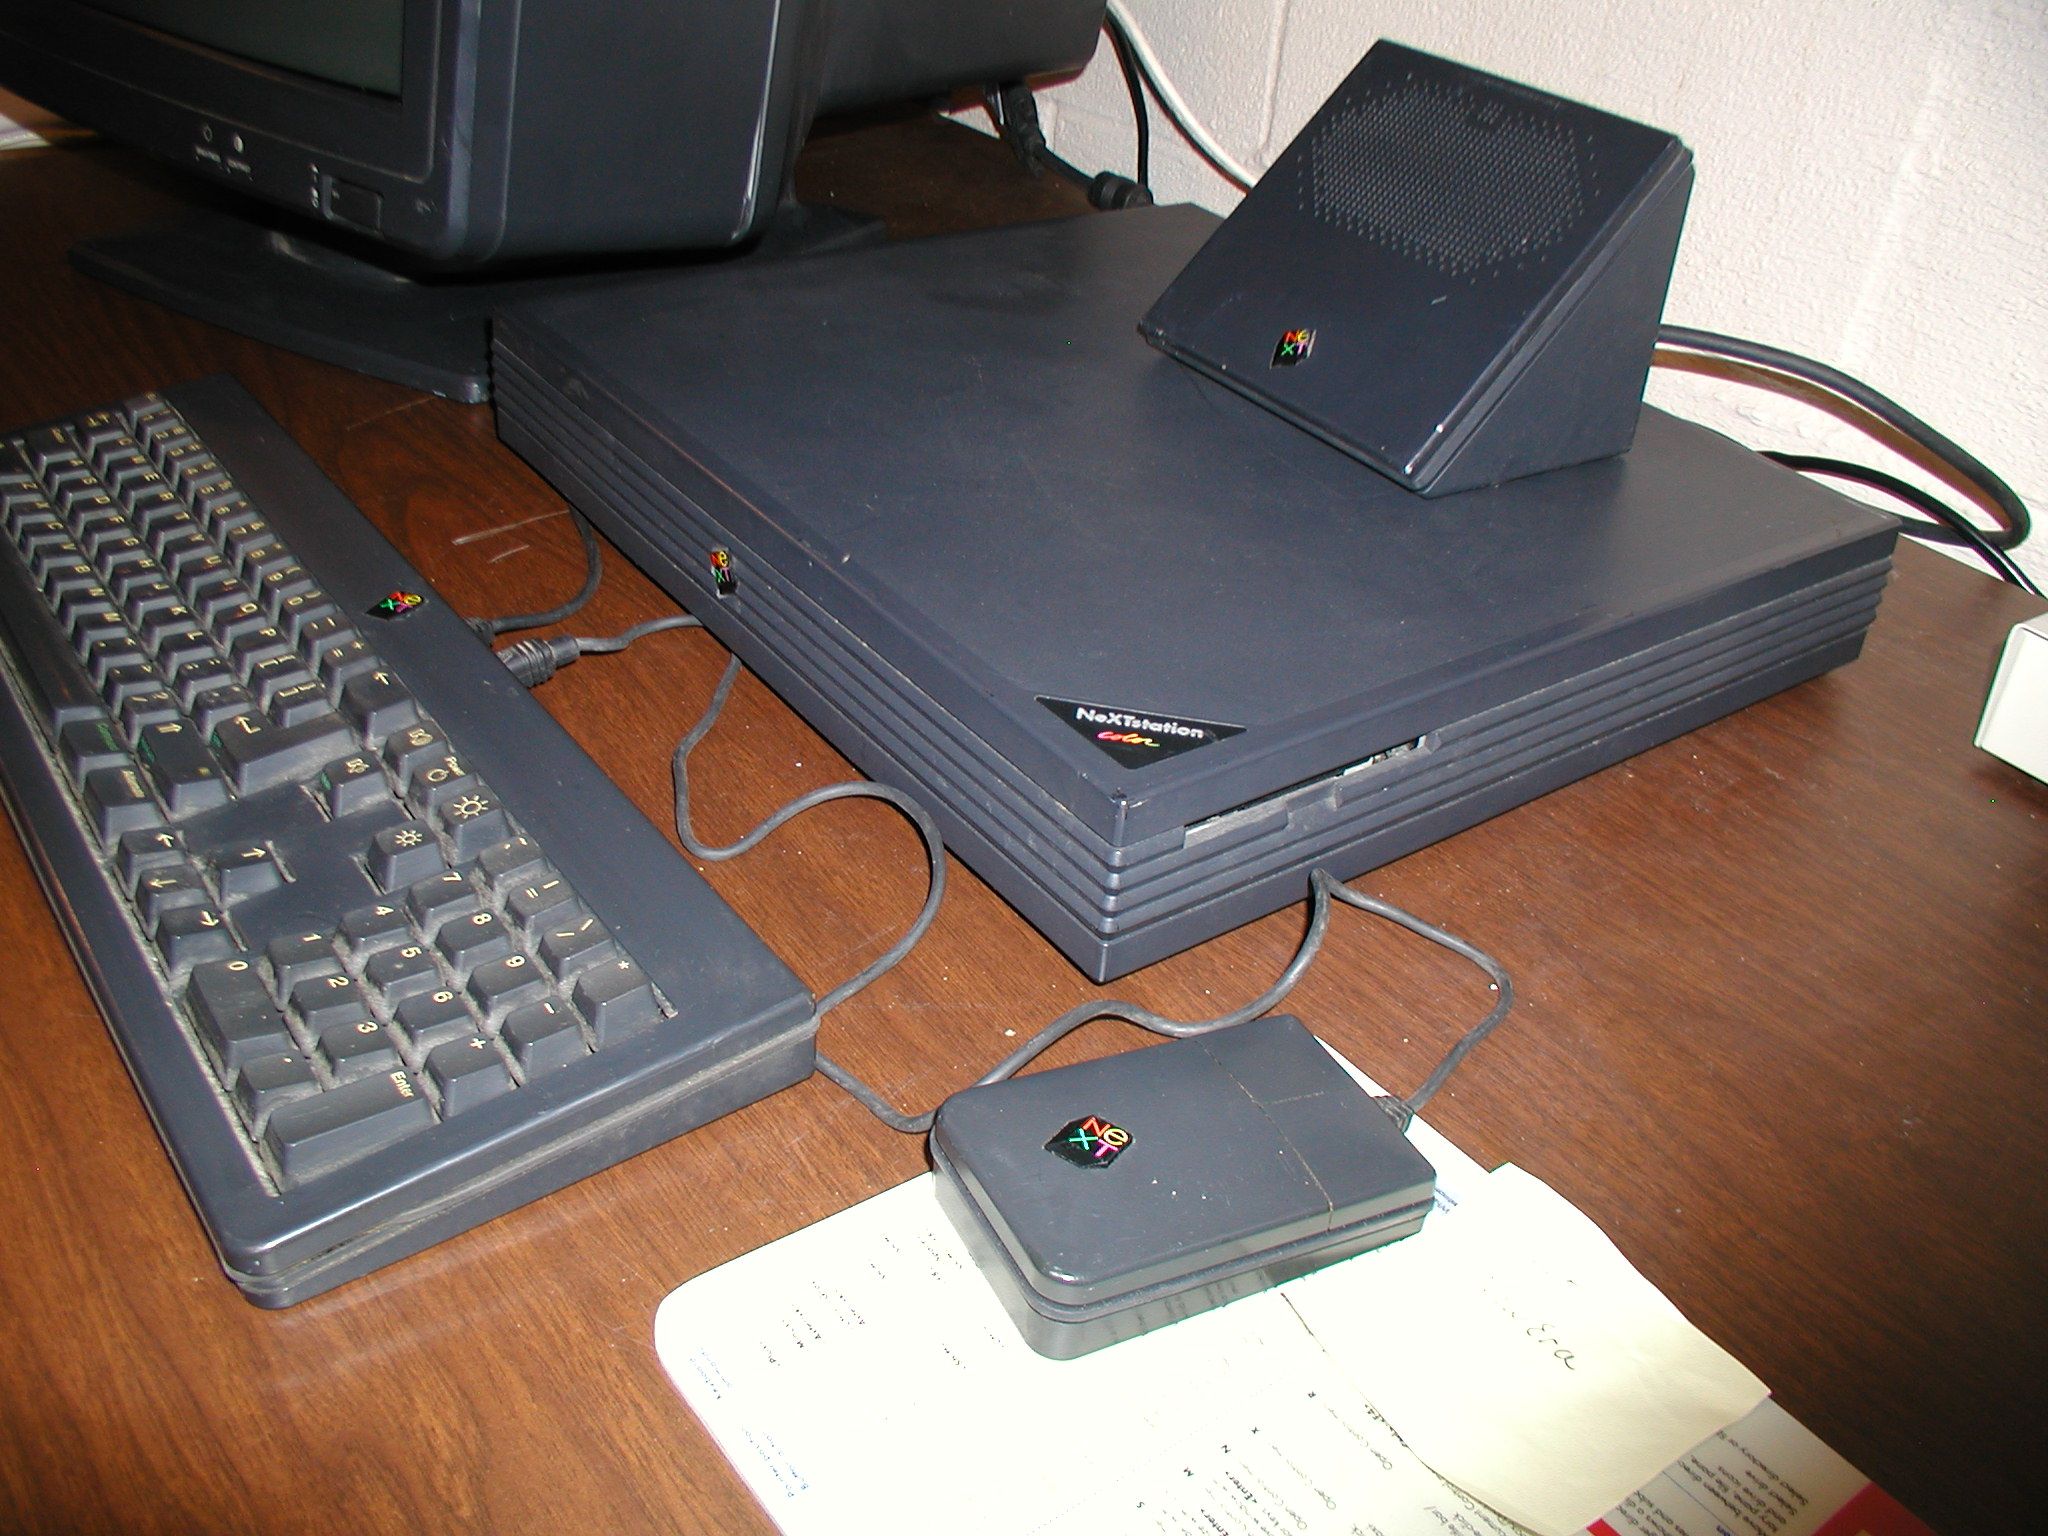
NextStation Color
SHARE |
|
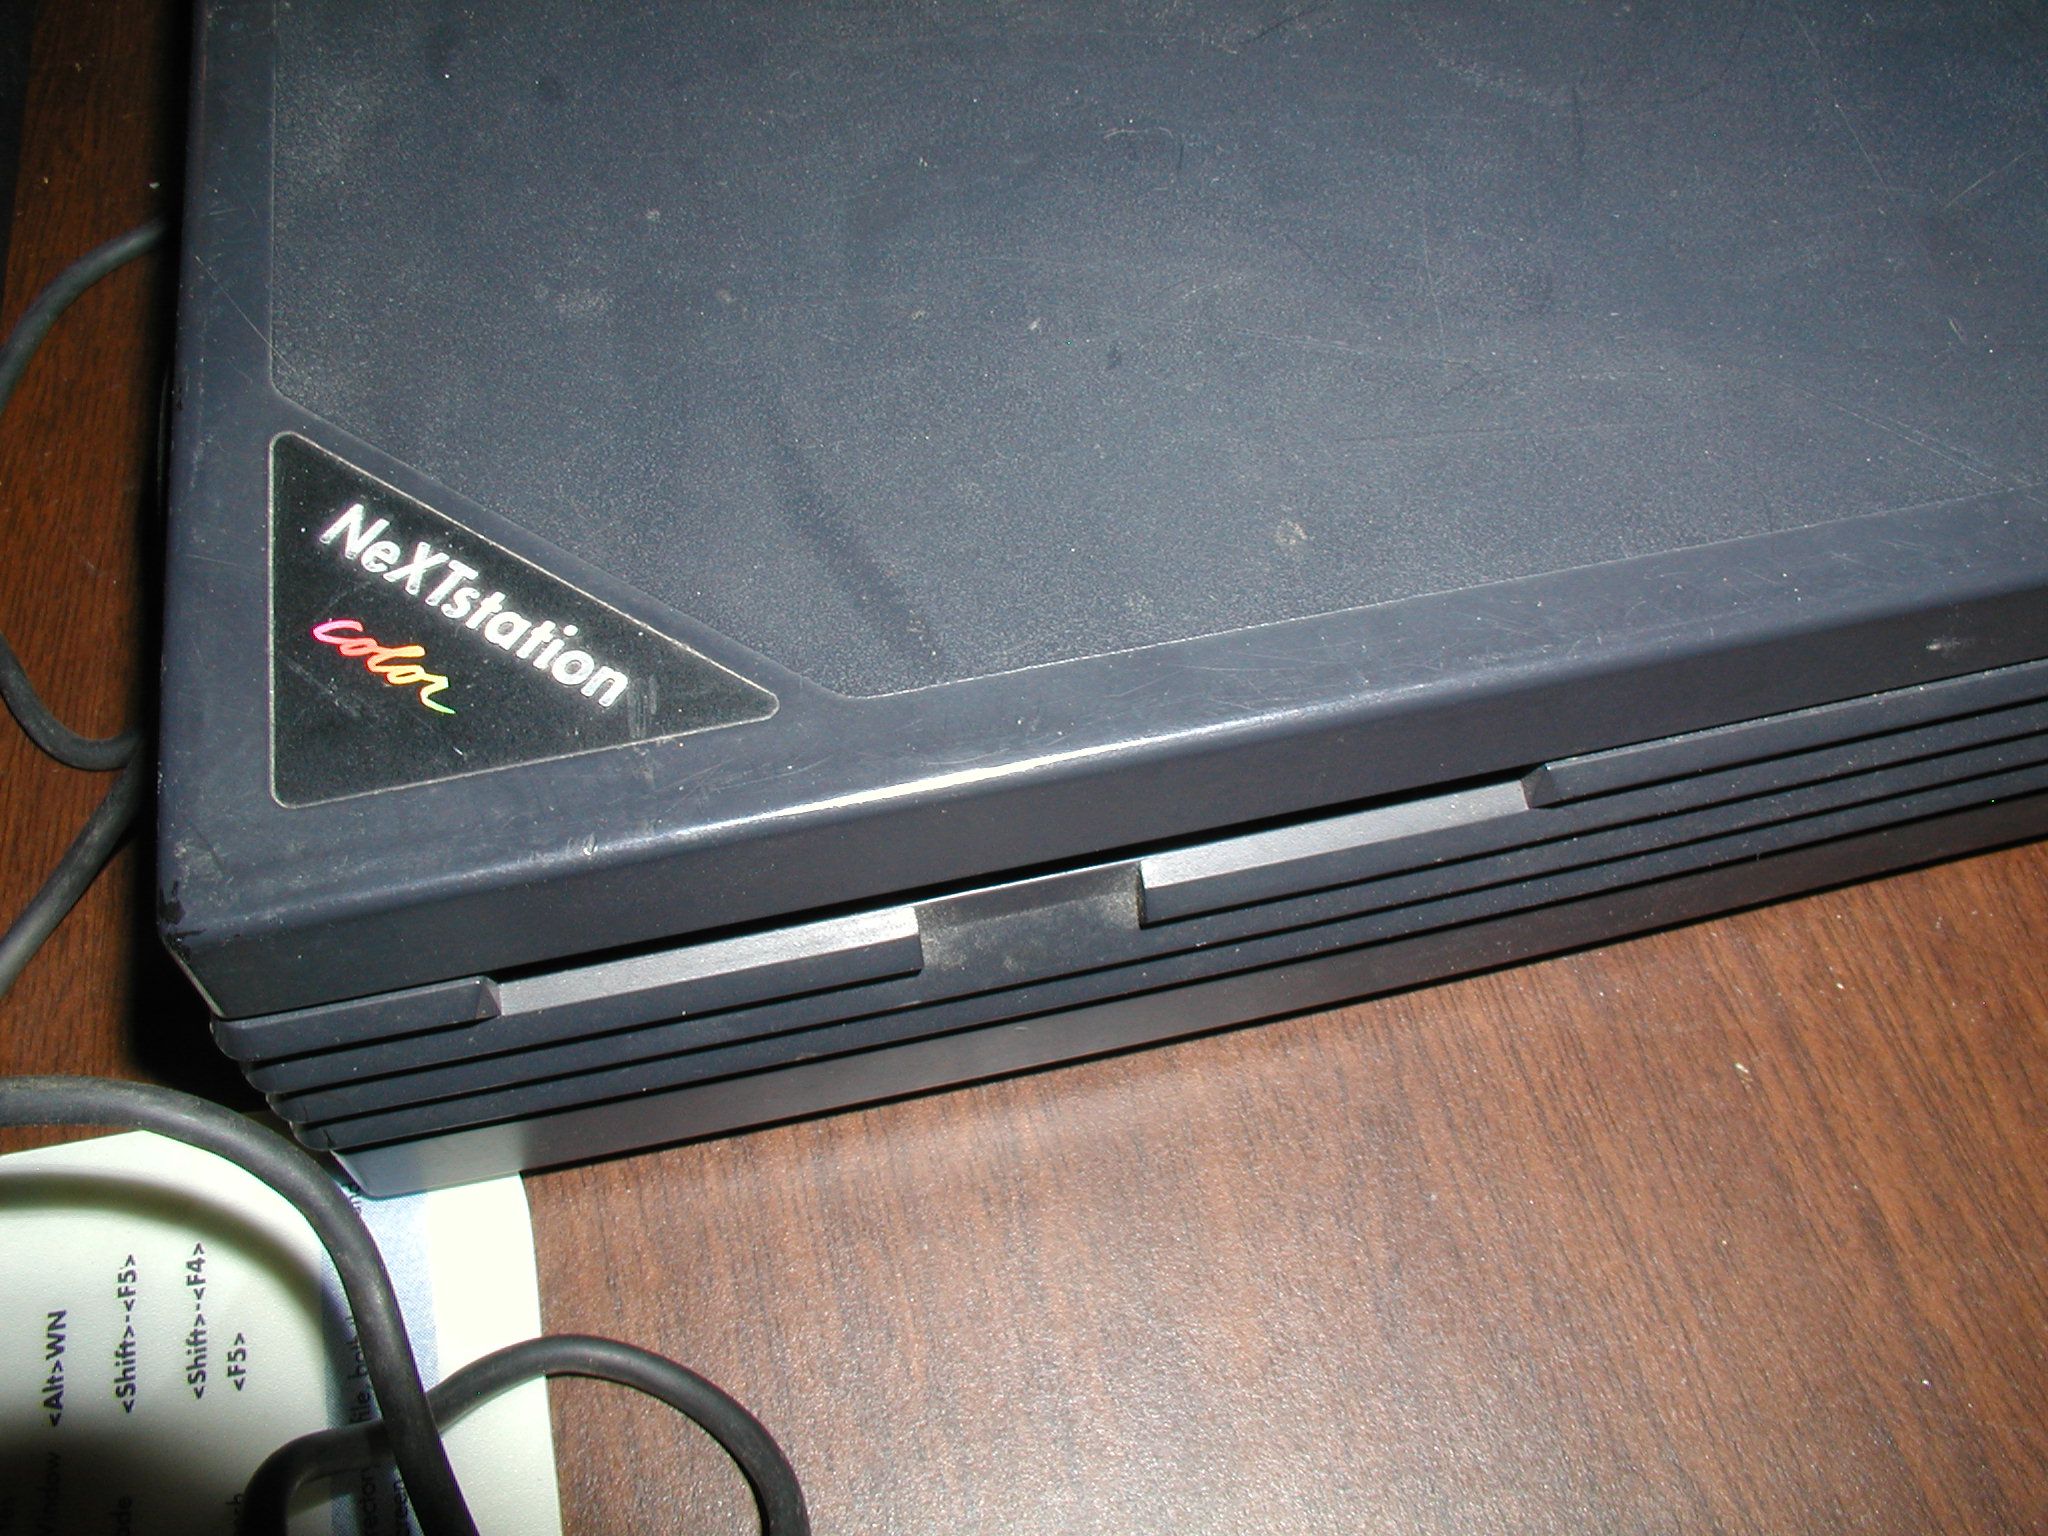
 NextStation Color
 |
by Bill Degnan - 09/22/2016 18:59 |
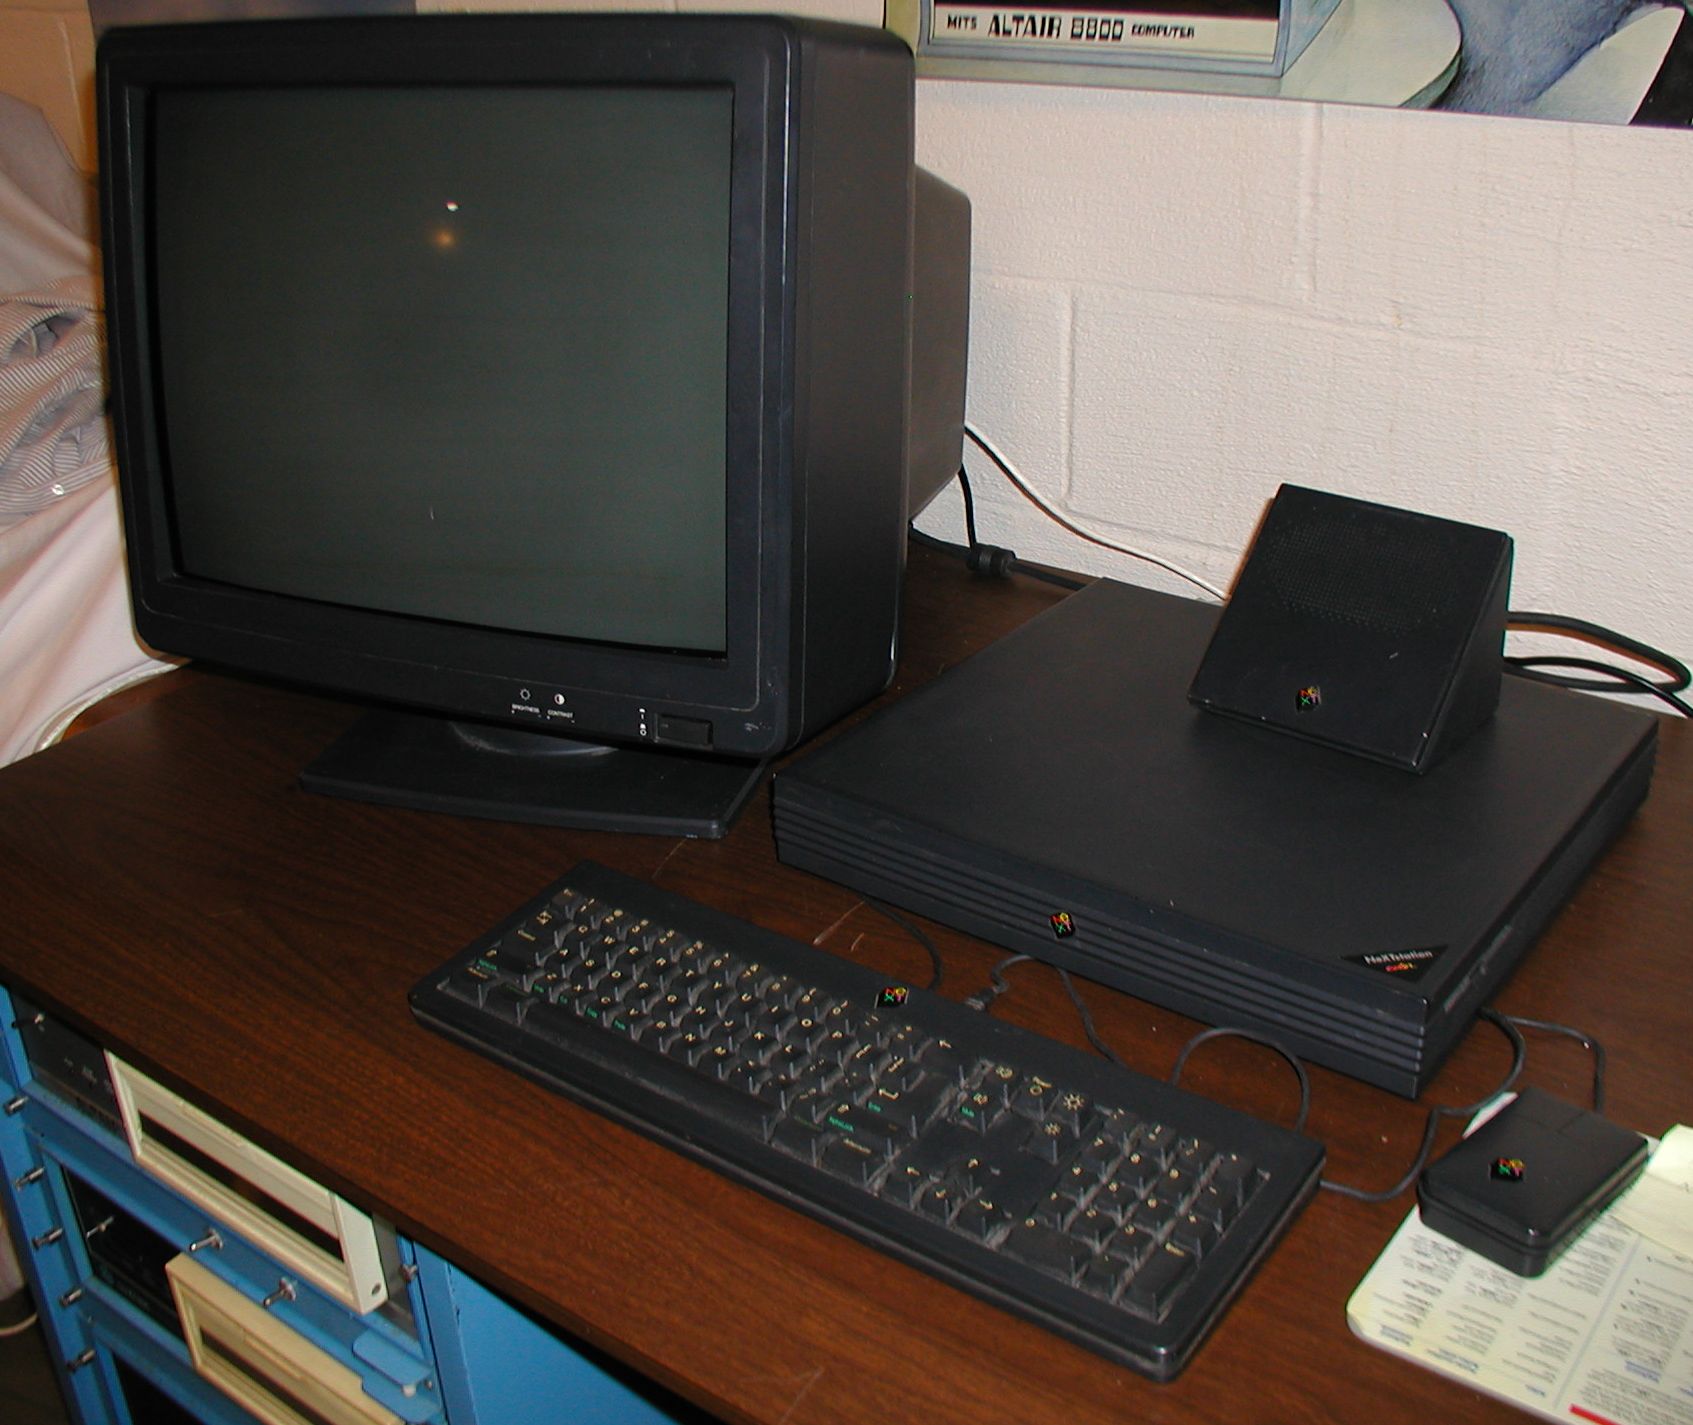 The NextStation Color. Photo shows system while loading NextStep. Click image for larger view.
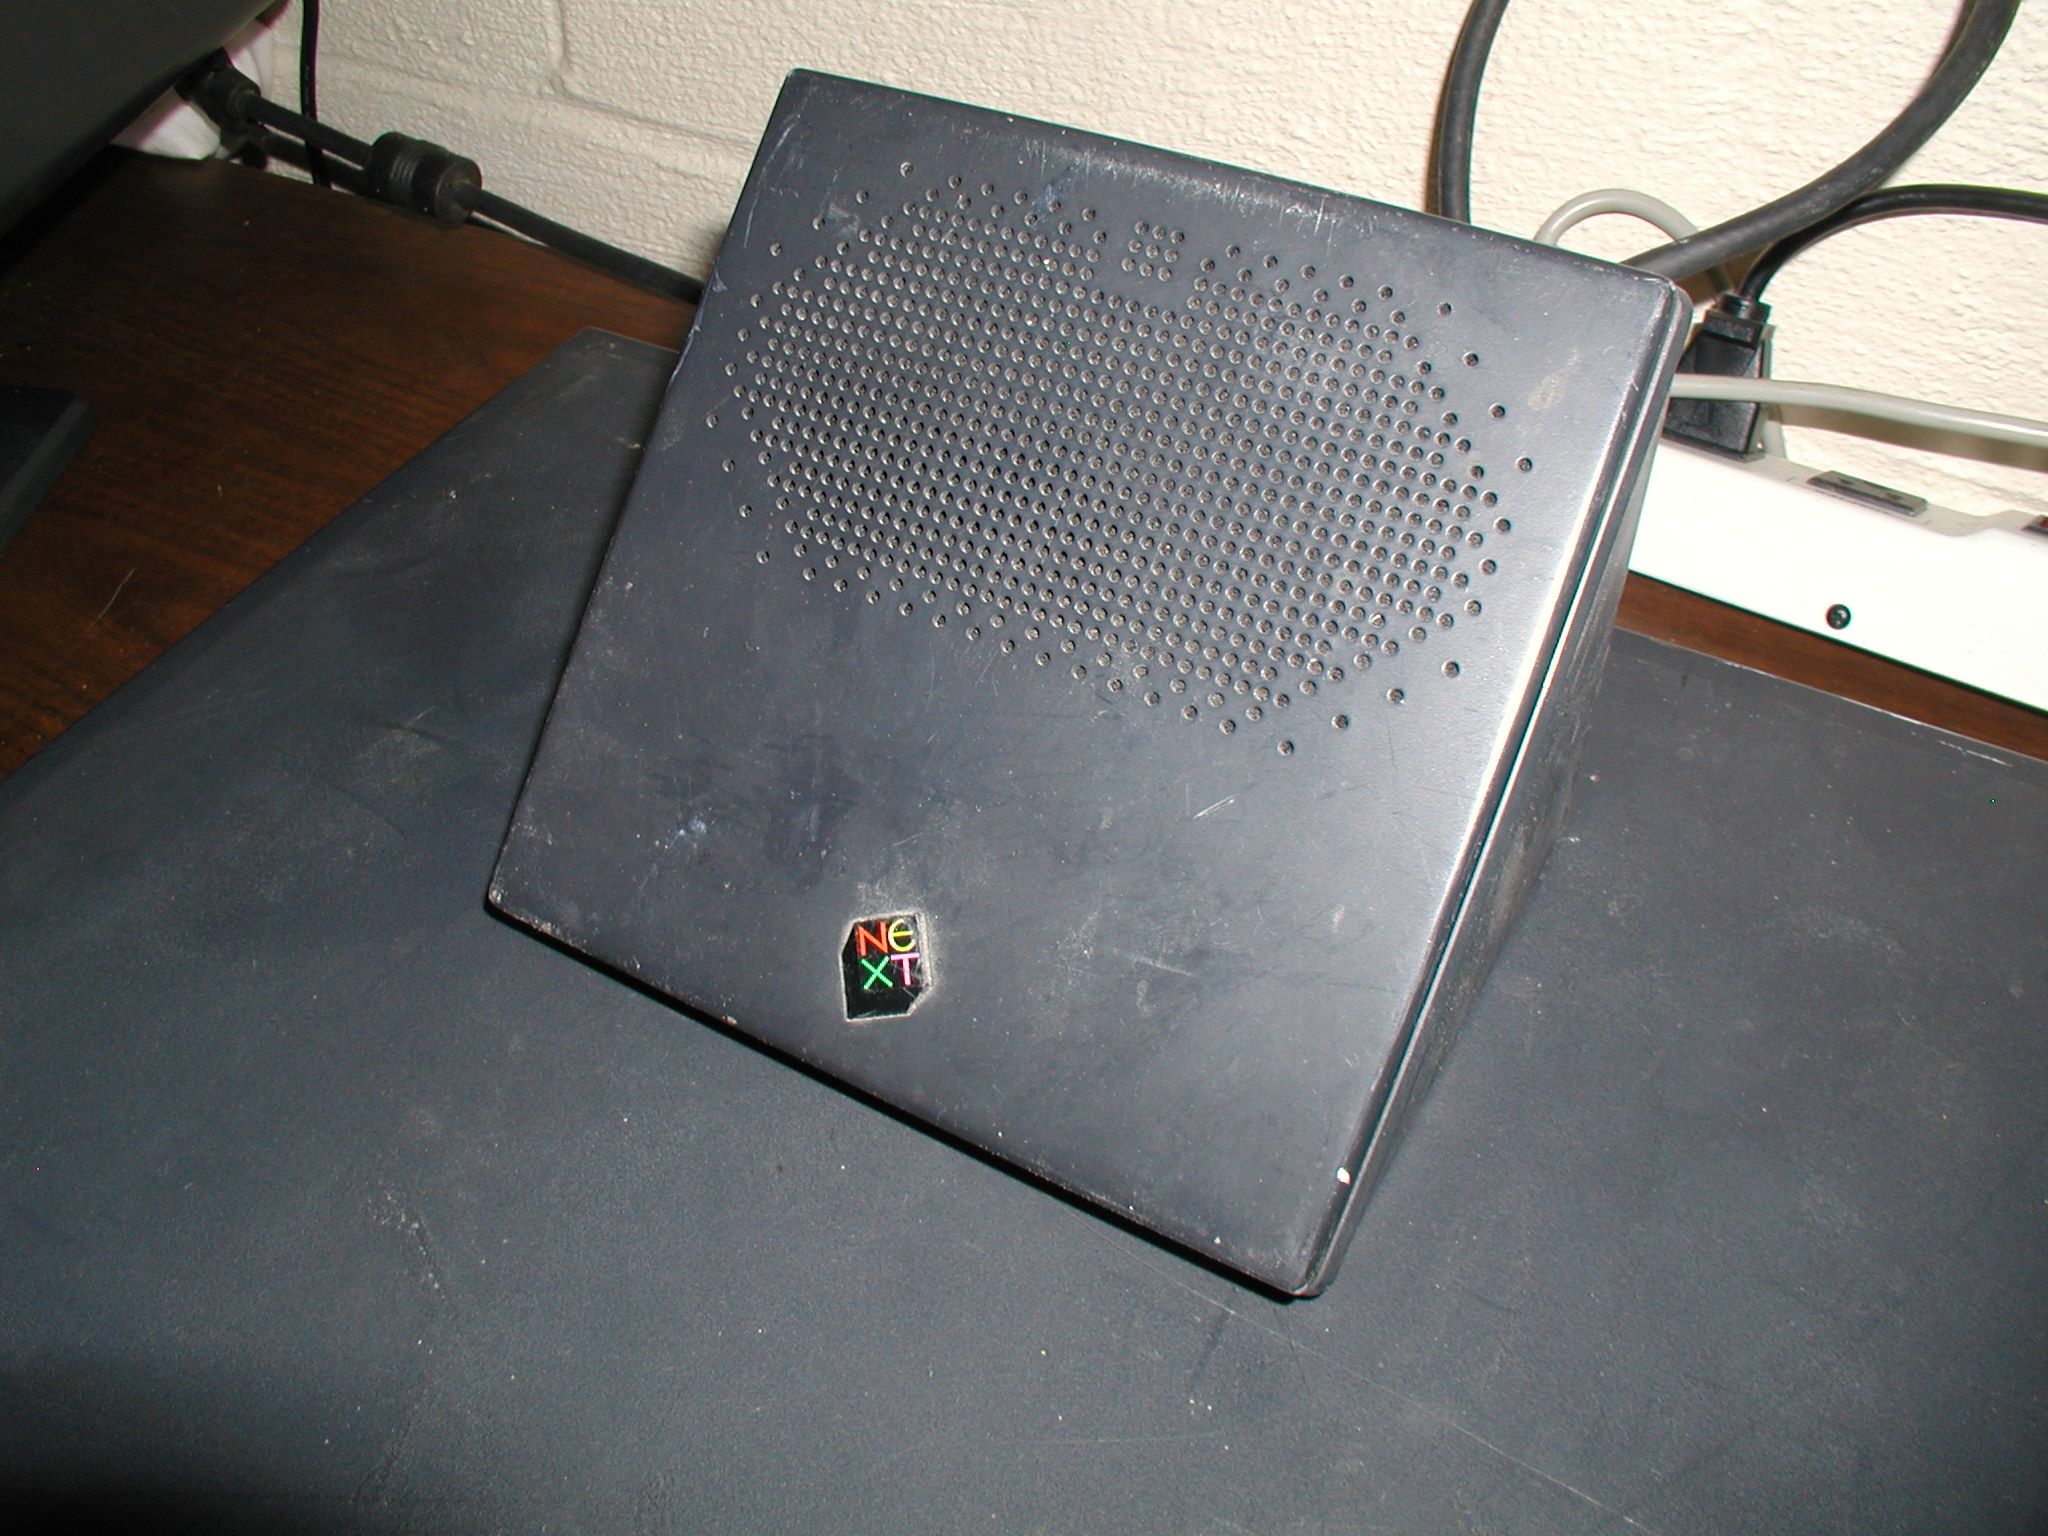 Pictured Next's Sound Box, an I/O port station. A separate box is necessary because the color workstation display does not have internal speakers like the monochrome display. The NS Color I/O cable attaches to the back of the computer on one end and on the other end the cable is split to connect to the display and the Sound Box. (Pictured here). The Sound Box also has a keyboard signal port. Like a MAC or SUN of the same vintage, the mouse connects to the keyboard. Click image for larger view.
 3.5" 2.88MB Floppy Drive supposedly compatible with Mac and PC DOS disks. Click image for larger view.
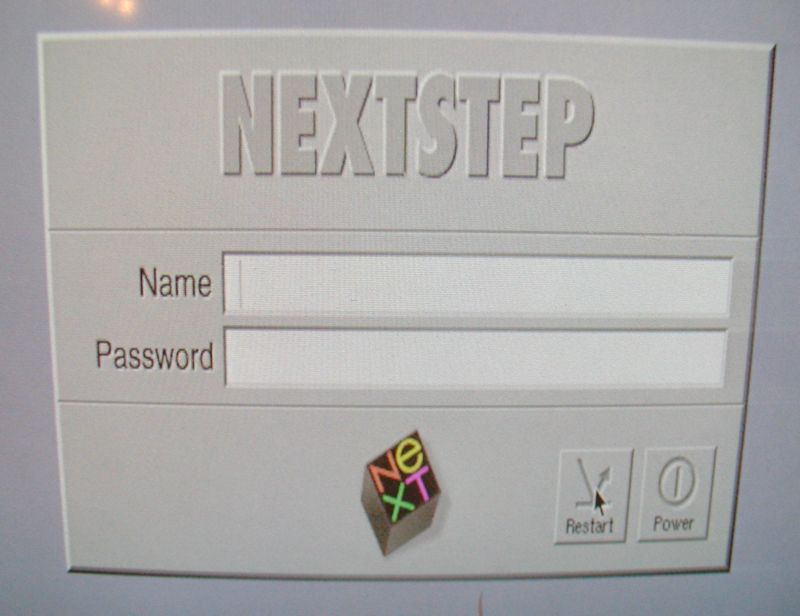 NextStep GUI OS Login Screen. Click image for larger view.
Pictures (before cleaning) Next: Clean system inside and out, and peripherals. Then, configure for networking, test drives, attach external SCSI drive, NEXT laser printer. Reply |
|
 Cleaning
 |
by Bill Degnan - 09/27/2016 12:49 |
 Click image for larger view.
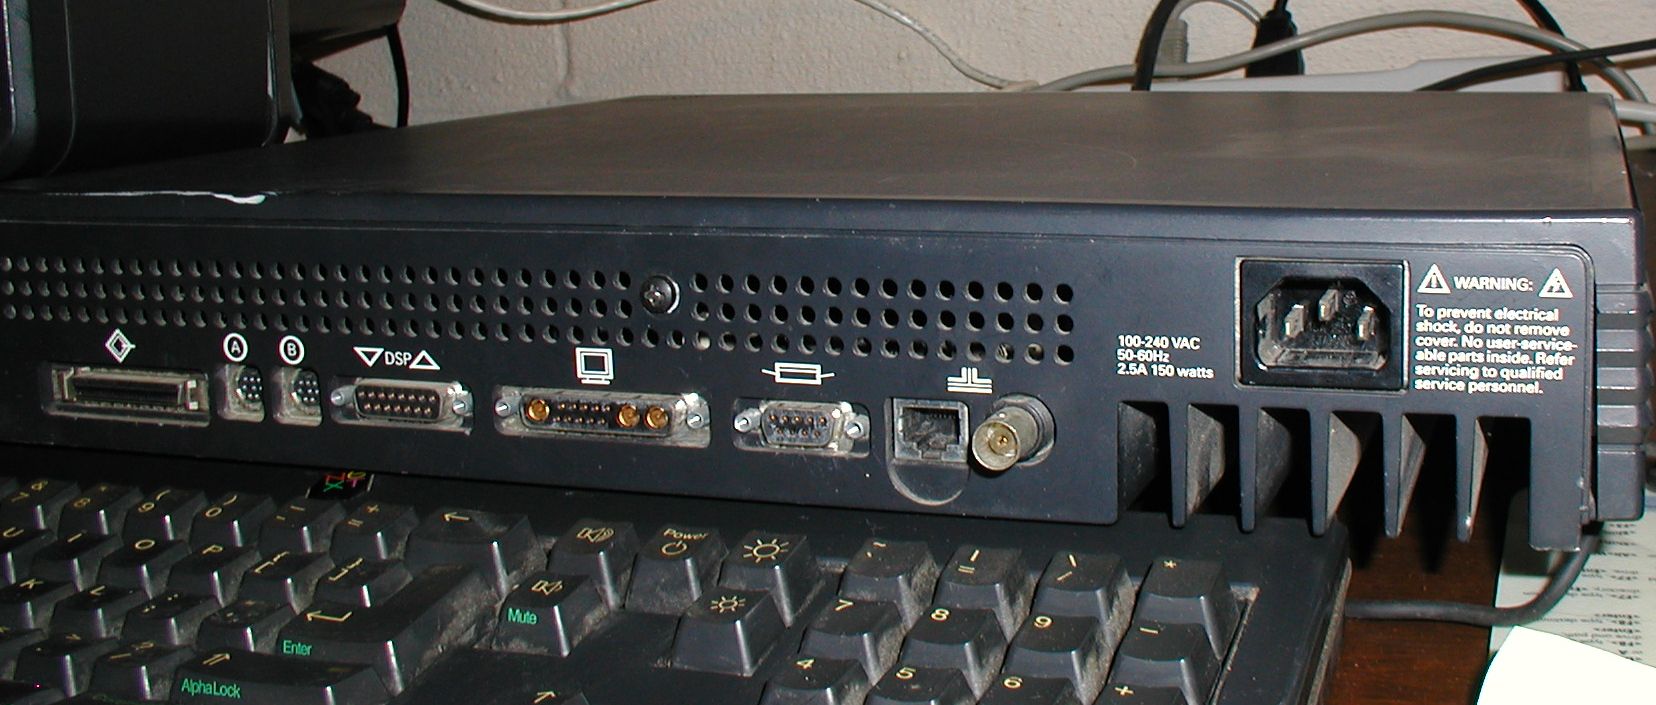 Rear Ports. Click image for larger view.
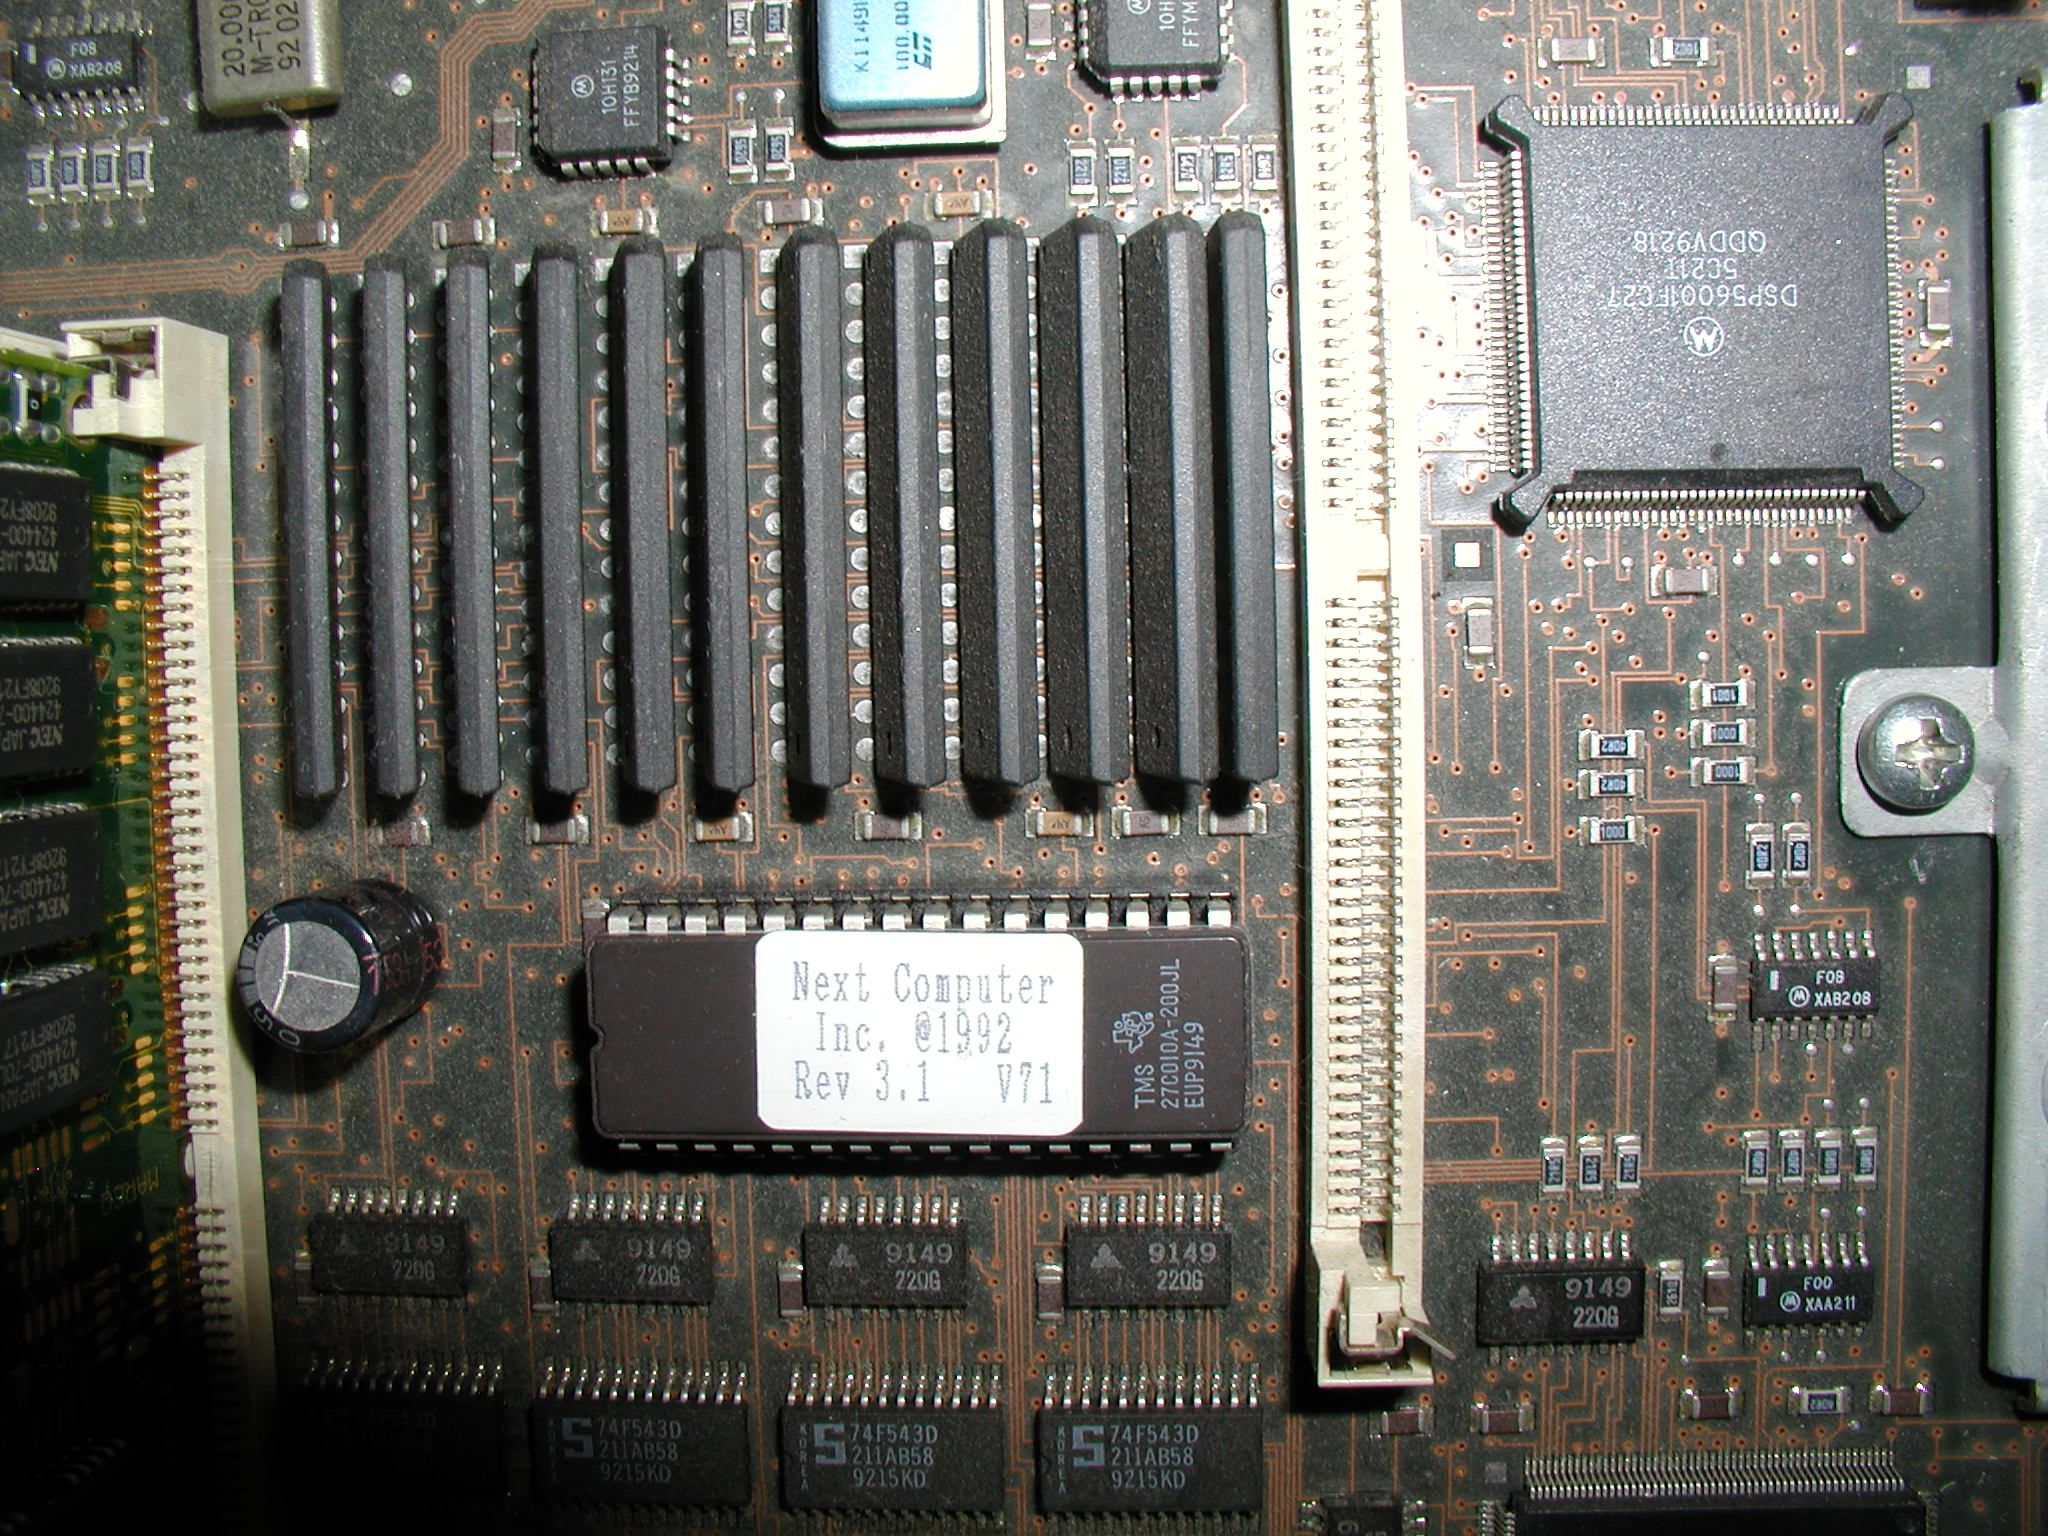 Close-up of ROM section of motherboard. Rev 3.1 v 71. Click image for larger view including center of motherboard where ROM is located.
Cleaned and took photos while I worked. Reply |
|
|
Networking |
by Bill Degnan - 10/08/2016 19:00 |
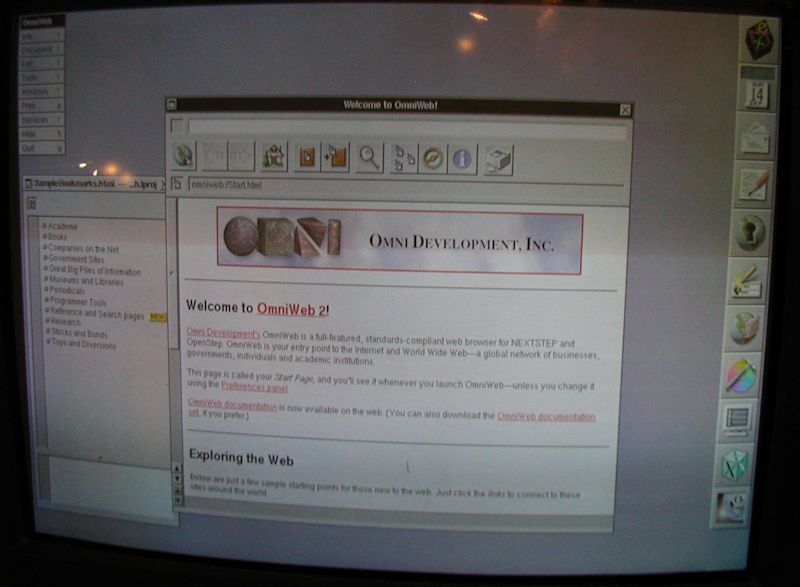
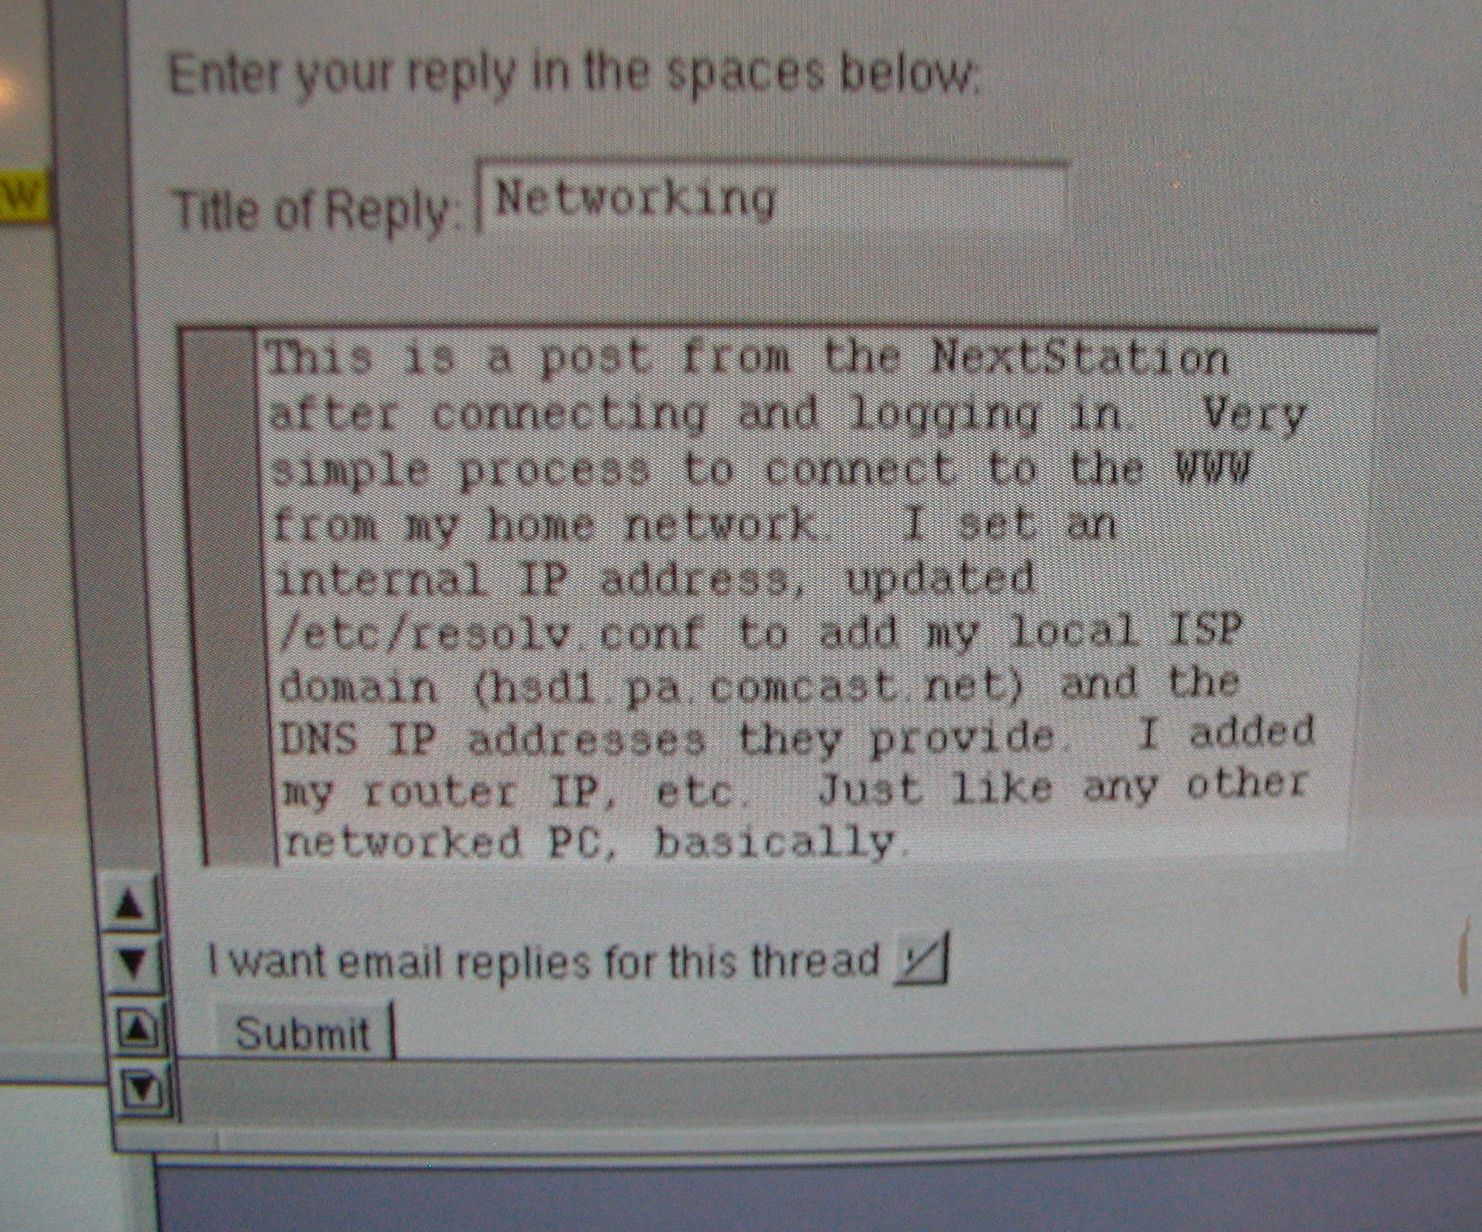 This is a post from the NextStation after connecting and logging in. The browser program is called OmniWeb and it appears to be Netscape 1.0 compatible, or capable-of. Works OK for such an old browser. Click image for larger view.
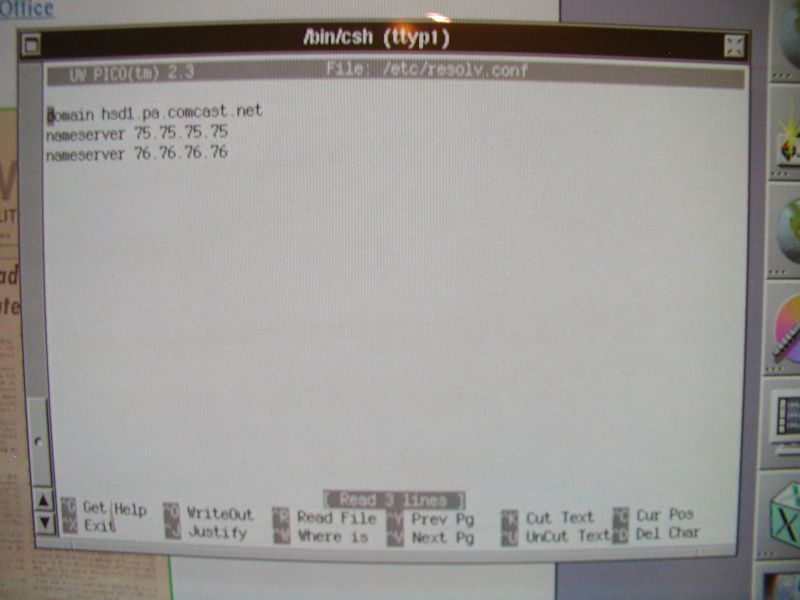
Very simple process to connect to the WWW from my home network. I set an internal IP address, updated /etc/resolv.conf to add my local ISP domain (hsd1.pa.comcast.net) and the DNS IP addresses Comcast uses by default. I added my router IP and made up an IP address within my home subnet (10.1.10.136) Just like any other networked PC, basically. There is a good walkthrough from nextcomputers.org that I downloaded and put on my web site, which I mirror here. Reply |
|
|
System Specs |
by Bill Degnan - 10/14/2016 18:05 |
 Next Workspace 3.3 splash screen shows this system is the 33 Mhz 68040 processor model, 32Mb RAM
Reply |
|
|
More NeXt How-to Notes |
by Bill Degnan - 06/19/2017 08:44 |
|
This past weekend Matthew W. taught me a few tricks on the NeXt...
Just after you power up the system "testing system" should print on the screen (using version 3 anyway) To get to the prompt: Command + ' ("The key with the single quote and tilde chars in the numberpad") That will dump a person to the Next> prompt if you time it, you may have to repeat a few times. From there enter the help command to see what else you can do, login etc. To boot to the GUI, the command is Next> boot, or you can try Next> bsd(0,0,0)/sdmach thanks for the help Matthew! [Command + ~] is a system reset. I noticed it takes a little longer to boot up from the command prompt that the regular GUI way. My guess is some set up processes only happen after the GUI requests them whereas if you boot to the command prompt everything is "loaded" such as networking connections. Not 100% it might just look like it takes longer. How to make your NeXtstation a "standalone" system. If when booting you have to enter "C" to continue because the system cannot find the master server "serves", here is how you fix (remove "serves" from NetInfoManager) 1. Log in via GUI 2. NextAdmin --> NetInfoManager 3. Domain --> Open; Choose "/" 4. Double-click broadcast-host 5. Select "Serves" which has value "../network" 6. Click edit from command menu in upper left corner of GUI --> delete 7. Click close window (of the NetInfoManager) and Save. It's annoying my NeXt did not have bash loaded by default. The previous owner of this box had it here: /usr/gnu/bin/bash Maybe that's where it is on your system too. Reply |
|
|
Replacing the Internal Battery |
by Bill Degnan - 12/04/2017 22:18 |
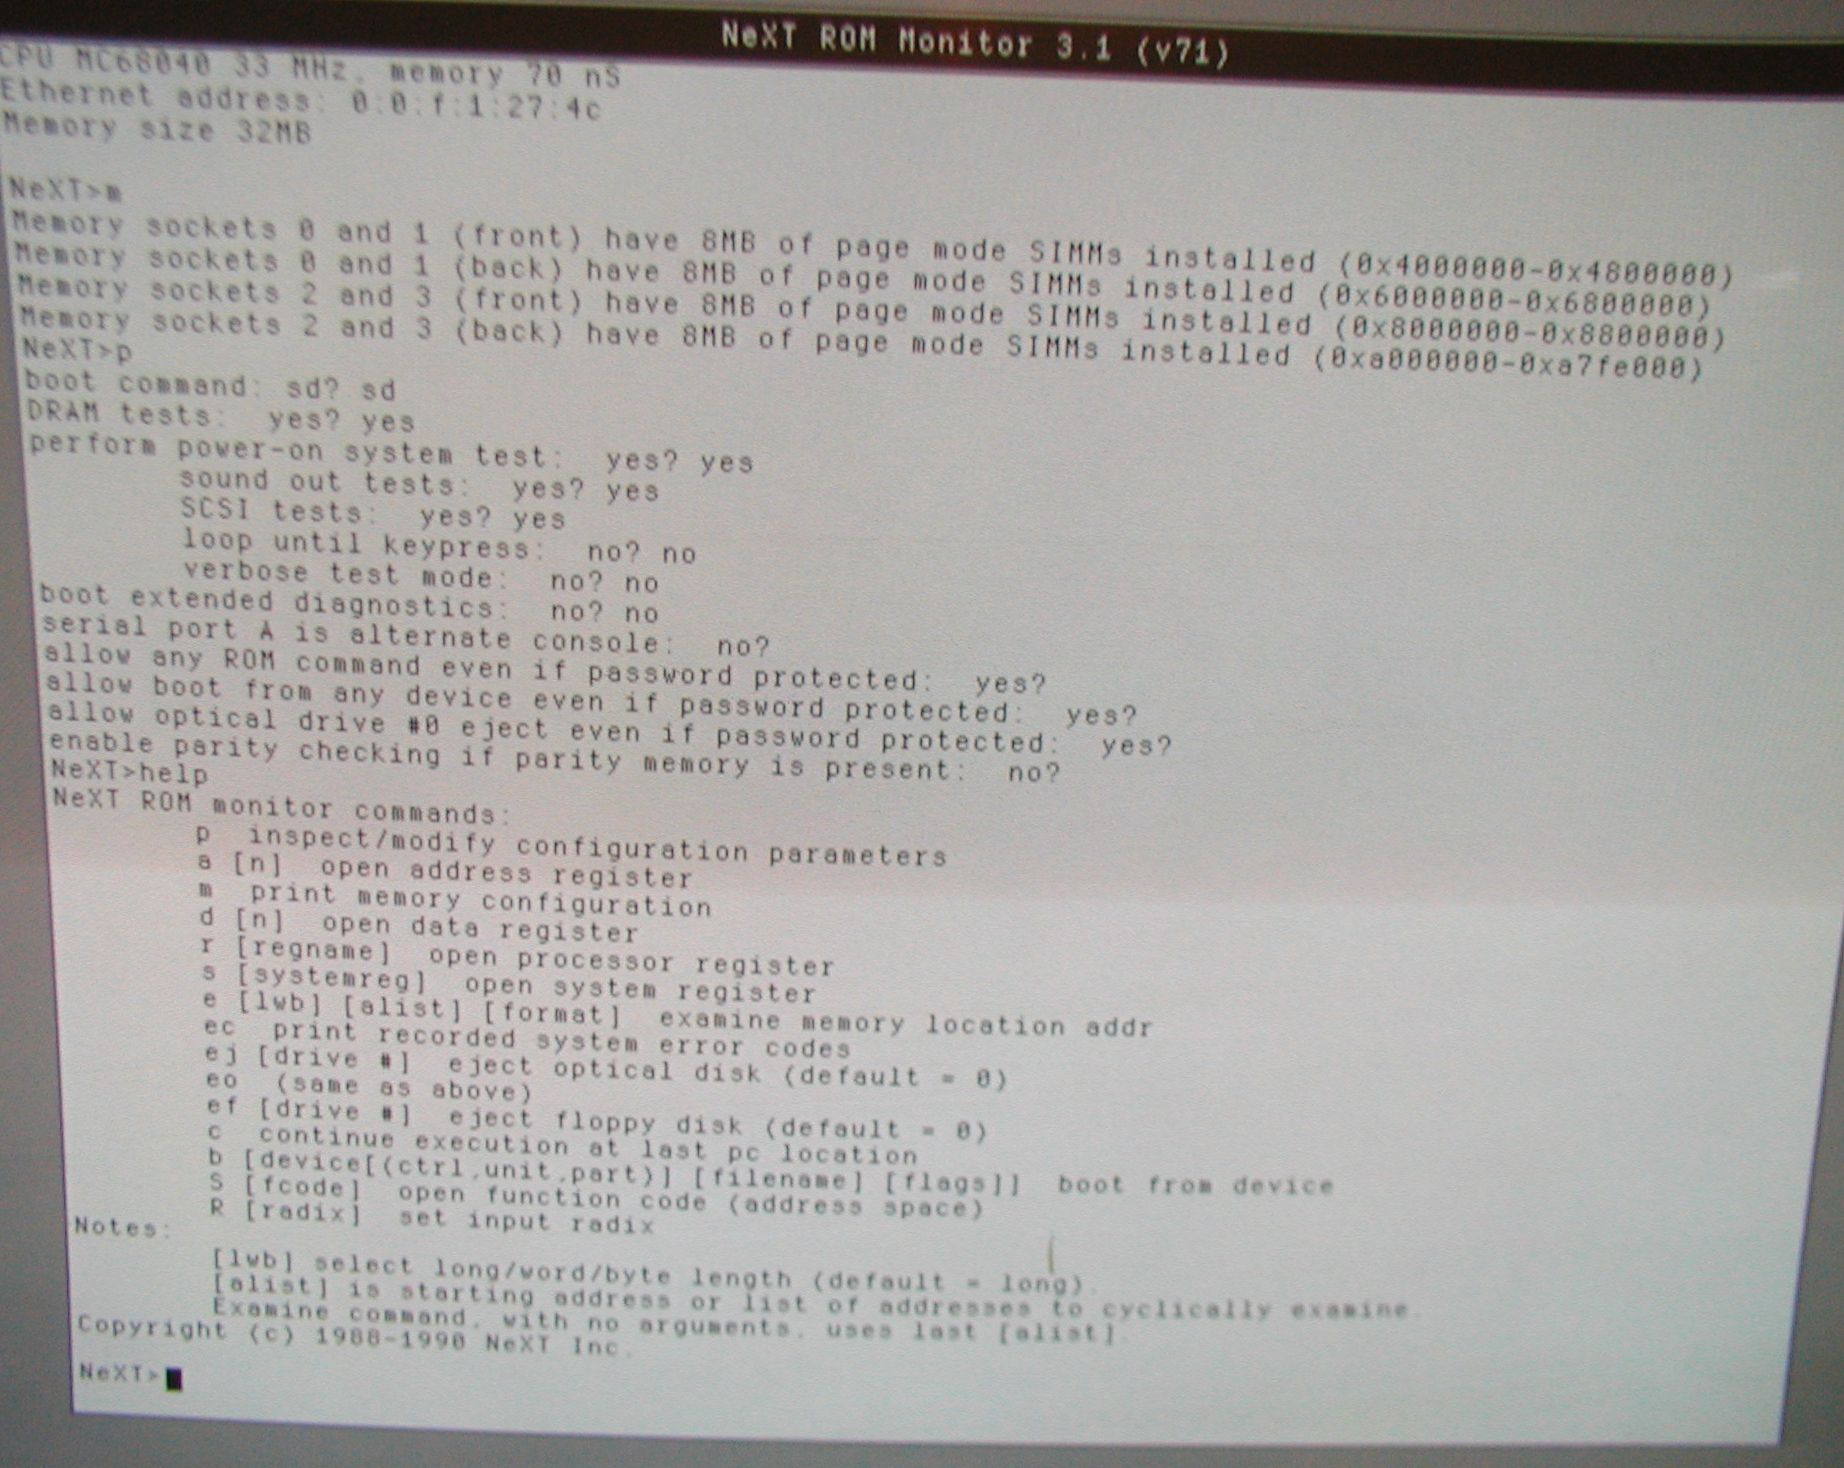 Access the Next> ROM monitor by hitting the Control + ~ key while the system is attempting to boot. Pictured is an exploratory session to check the system configuration and to display the available commands within the monitor. Pretty straight-forward. Click image for larger view.
I was curious to see if one should back up the system parameters stored in the internal battery-powered ROM while the battery is still good to avoid having to guess how to restore the system setup after losing the battery BIOS or whatever you call the internal configs stored in battery-powered ROM. Next> p (initiates the system inspect/setup routine) I believe the default is to boot off the network (" en ") rather than the scsi drive (" sd "), so the first thing I predict I will have to do after changing the battery (or if it dies) is change the boot device to sd (scsi disk). The image above shows the computer's configs as they are now, in proper working order. When I probed the battery with a volt meter I found it still had 2.8 volts, fading but not yet dead. It's not a rechargeable so it's less likely to leak. Still it will need to be changed eventually as do all internal computer batteries. I learned the hard way from my experience with an IBM AT that removing the internal battery might cause unforeseen problems, best to know what you're dealing with before you start. Yup. It's actually easier than I thought. Most of the configs are stored on the hard drive, so when you replace the battery get to the Next> prompt (Control + ~) and enter the command help. That will show you all of the commands you can use, or just do this: Next> p (to inspect/modify configuration params, follow the prompts, leave the default values in most cases.) When asked for the "boot command" value, assuming you're using a SCSI hard drive, enter: sd If you have more than one drive or a different boot partition you'll have to be more precise, but that's pretty much it, the rest of the configs are automatic. When you're done, reboot. Next> b sd Found these: http://www.nextcomputers...48339e2d47ccef05c364b57 https://www.bytecellar.c...rbo-color-battery-swap/ Reply |
|
Resources:

Popular Topics and FAQs
Past Issues:
Before we switched over to a blog format, past page archives here:
Vintage Computer Festival East 3.0 June 2006
Commodore B Series Prototypes July 2006
VOLSCAN - The first desktop computer with a GUI? Oct 2006
ROBOTS! - Will Robots Take Over? Nov 2006
Magnavox Mystery - a Computer, or? Jan 2007
The 1973 Williams Paddle Ball Arcade Computer Game Feb 2007
The Sperry UNIVAC 1219 Military Computer May 2007
VCF East 2007 - PET 30th Anniversary June/July 2007
The Electronic Brain August 2007
Community Memory and The People's Computer Company October 2007
Charles Babbage's Calculating Machine December 2007
Vintage Computing - A 1983 Perspective February 2008
Laptops and Portables May 2008
From Giant Brains to Hobby Computers - 1957 to 1977 August 2008
Historic Computer Magazines November 2008
World's Smallest Electronic Brain - Simon (1950) December 2008 - Feb 2009
Free Program Listings Spring 2009
Computer Music Summer 2009
Popular Electronics Jan/Feb 1975 - Altair 8800 Fall 2009
Early Microcomputer Mass Storage Summer 2010
Kit pic10

This image was selected at random from the archive. Click image for more photos and files from this set.