NeXTstation Turbo
SHARE |
|
  NeXTstation Turbo
 |
by Bill Degnan - 12/27/2017 20:33 |
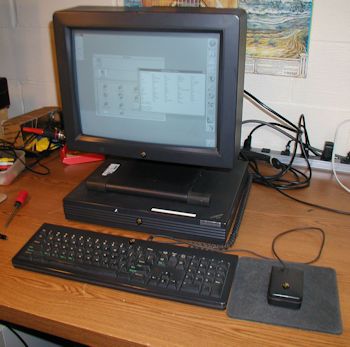
 The NeXTstation Turbo computer. The effort required to get this machine running was minimal. I was able to complete a usable network configuration within a few minutes. As with most NeXT systems it came installed with the NeXTStep version of Berkeley UNIX BSD, the grandfather of the MAC OS X. Click image for larger view.
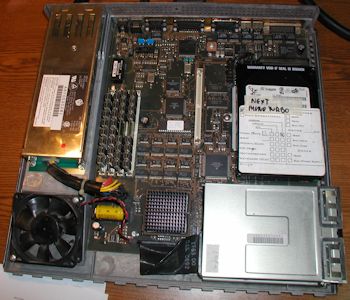
 Here is a view of the motherboard, drives, and power supply. Click image for larger view.
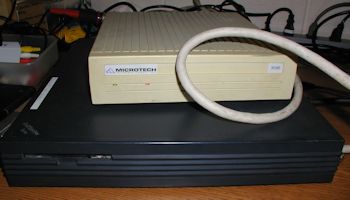
 I attached an external SCSI hard drive to the external SCSI port. With this configuration I ran the BUILDDISK utility to create a bootable OS drive, essentially a transportable clone of the internal hard drive. BUILDDISK is nice for rebuilding or replacing drives. In my case the new bootable drive will be used to repair my NeXT Cube's corrupted internal drive. BUILDDISK is very simple to use, just make sure your external drive is not set to "0" before you plug it into the external SCSI port on the back of the source computer and power on the system. The NeXT will automatically detect that the external drive is present. Within BUILDDISK select your target to be the external drive (not the SYSTEM drive) and follow the screens. I have a few screenshots linked below. When you move the external drive to the target machine, change it to be SCSI ID 0, and the target drive ID to something else (i.e. 2). The target can be another external drive but usually you'd want the target SCSI drive to be attached directly to the motherboard (the internal drive). Boot off the external drive and run BUILDDISK from there. Target the internal SCSI drive, which at this point is SCSI ID 2 (!= 0). When the build is complete, power off the system, change the target ID to 0, remove or re-ID the external drive and boot. Click image for larger view.
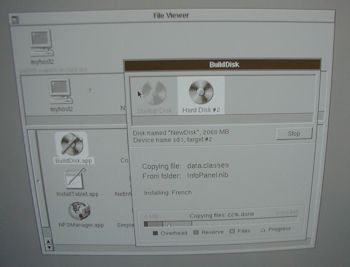
 Pictured, the BuildDisk is copying/installing the OS onto the external drive. Click image for larger view.
More photos Reply |
|
Resources:

Popular Topics and FAQs
Past Issues:
Before we switched over to a blog format, past page archives here:
Vintage Computer Festival East 3.0 June 2006
Commodore B Series Prototypes July 2006
VOLSCAN - The first desktop computer with a GUI? Oct 2006
ROBOTS! - Will Robots Take Over? Nov 2006
Magnavox Mystery - a Computer, or? Jan 2007
The 1973 Williams Paddle Ball Arcade Computer Game Feb 2007
The Sperry UNIVAC 1219 Military Computer May 2007
VCF East 2007 - PET 30th Anniversary June/July 2007
The Electronic Brain August 2007
Community Memory and The People's Computer Company October 2007
Charles Babbage's Calculating Machine December 2007
Vintage Computing - A 1983 Perspective February 2008
Laptops and Portables May 2008
From Giant Brains to Hobby Computers - 1957 to 1977 August 2008
Historic Computer Magazines November 2008
World's Smallest Electronic Brain - Simon (1950) December 2008 - Feb 2009
Free Program Listings Spring 2009
Computer Music Summer 2009
Popular Electronics Jan/Feb 1975 - Altair 8800 Fall 2009
Early Microcomputer Mass Storage Summer 2010
drive
This image was selected at random from the archive. Click image for more photos and files from this set.