Build a bootable RSX11/M on RL02 disk
SHARE |
|
 Build a bootable RSX11/M on RL02 disk
 |
by Bill Degnan - 02/06/2017 21:58 |
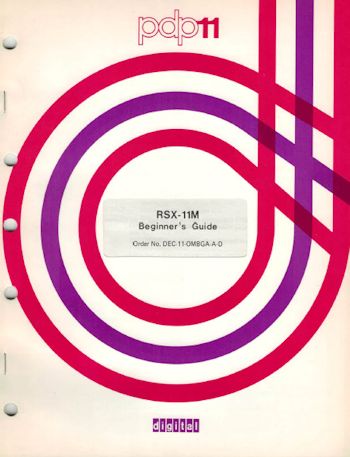 Scan of my cover of the Digital pdp11 RSX-11M Beginner's Guide manual.
RSX-11M Manuals http://wwcm.synology.me/RSX-11%20Manuals.html This thread describes how one might use simH on a $9.95 Next Thing Co CHIP to make an RL02 image of RSX11/M V 4.0 BL 32 (BASELINE). I got the how-to via web search and clues from CCTECH and simH user group members interested in the project. My case - For my PDP 11/40 I have no working EIS option card. (Otherwise I'd be using UNIX 6.) I already have RT11 running but I wanted to try RSX11. I was told that RSX11/M v.4.0 BL 3.2 is the newest OS version compatible with my system. Distribution media disk images for RSX11/M can be found in RL01 format but not RL02, so I had to first build one RL01 boot disk using 4 RL01s and then port to RL02. 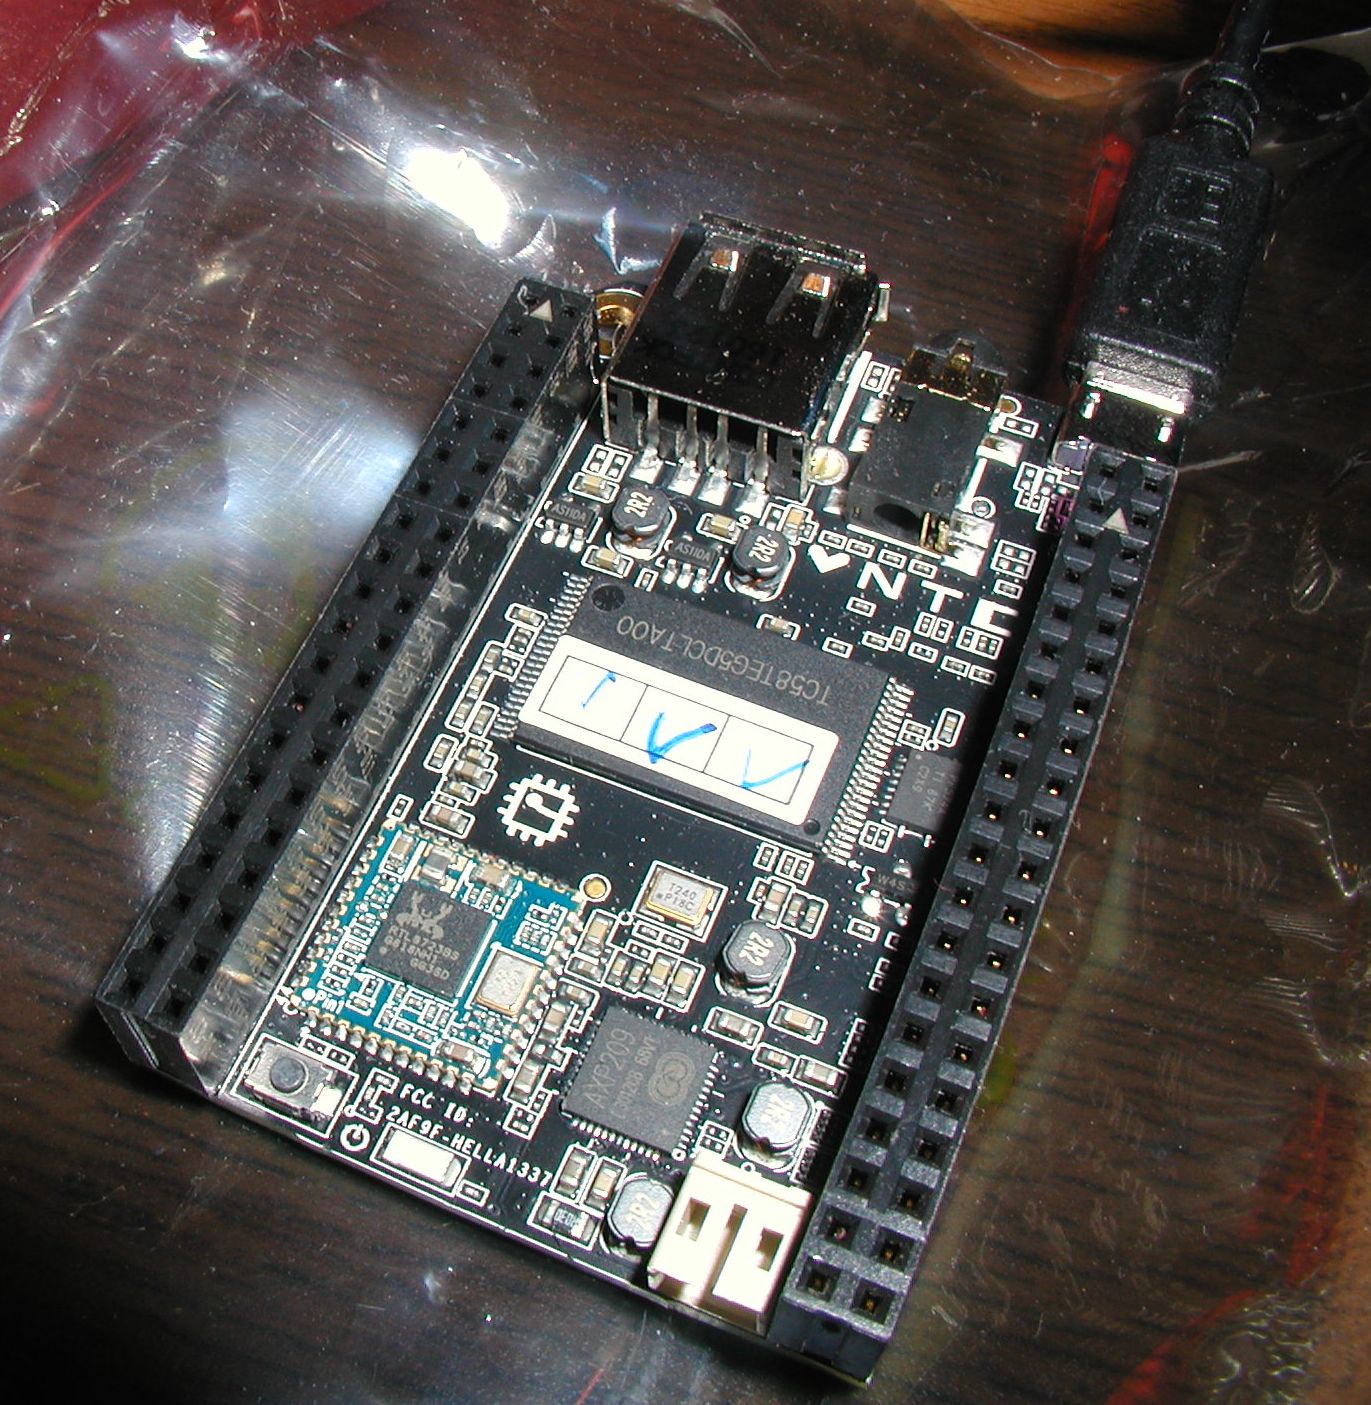 The Next Thing Co C.H.I.P running simH as a headless terminal. The CHIP has networking built in, and easily handles being a PDP-11/40 with 4 RL01's, RL02, TX05 tape drive and SSH to transfer files. I access the CHIP from my laptop via local subnet SSH. Click image for larger view.
Steps: 1. I built an RL01 disk with RSX11/M that boots within simH's PDP 11 emulator, using the files I found online. I set up a a simh instance similar to my actual pdp 11/40 with 64K simh> set cpu 11/40 simh> set cpu 64K simh> set rl0 writeenabled simh> set rl0 rl01 simh> set rl1 writeenabled simh> set rl1 rl01 simh> set rl2 writeenabled simh> set rl2 rl01 simh> set rl3 writeenabled simh> set rl3 rl01 simh> attach rl0 rsxm32.rl01 simh> attach rl1 excprv.rl01 simh> attach rl2 mcrsrc.rl01 simh> attach rl3 rlutil.rl01 simh> boot rl0 [put you into RSX11/M. Set the time and date. Enter commands at prompt:] > ins $boo > boo [1,54]rsx11m [reboots RSX] 1.5. Make instance boot into the mapped version of RSX11 each time - > acs sy:/blks=0 (after the acs command I was told to wait for a response that the checkpoint file is inactive, but I think if you run the following command it waits for this to happen. ): > sav /wb [Exit RSX11] 2. Next I made a copy of a blank RL02 disk image file (I called the copy file rlRSX11M.dsk see script reference of this file name, below) 3. I also downloaded a tape image from bitsavers.org with the program that copies files from an RL01 image to an (empty) RL02 image file. This program would also work with an actual rl01 and rl02. I *think* this is an TX50 tape "TQ". BB-L974F-BC_RSX11M_4.5_BRU64K.tap 4. I created a simh script to load up the tape. Note the RAM is set to 256K for this step. I called the script RSX-11_copy2RL02.ini: set cpu 11/40 set cpu 256K set rl0 writeenabled set rl0 rl01 set rl1 writeenabled set rl1 rl02 attach rl0 rsxm32.rl01 attach rl1 rlRSX11M.dsk attach TQ0 -r BB-L974F-BC_RSX11M_4.5_BRU64K.tap b TQ0 Run this from simH and it will land you into the stand-alone tape utility. The program starts. Set the date per the requested format and enter these commands to run the copy program: > run bru drops you into BRU. At BRU prompt: BRU> /init dl0: dl1: Note: when asked, the first device is dl0: second device is dl1: You'll get screen feedback when the copy is done. Exit the tape and test the RL02 via simH. simH script: set cpu 11/40 set cpu 64K set rl0 writeenabled set rl0 rl02 attach rl0 rlRSX11M.dsk boot rl0 [Boot? then move to the next step if you want to migrate to an actual RL02] 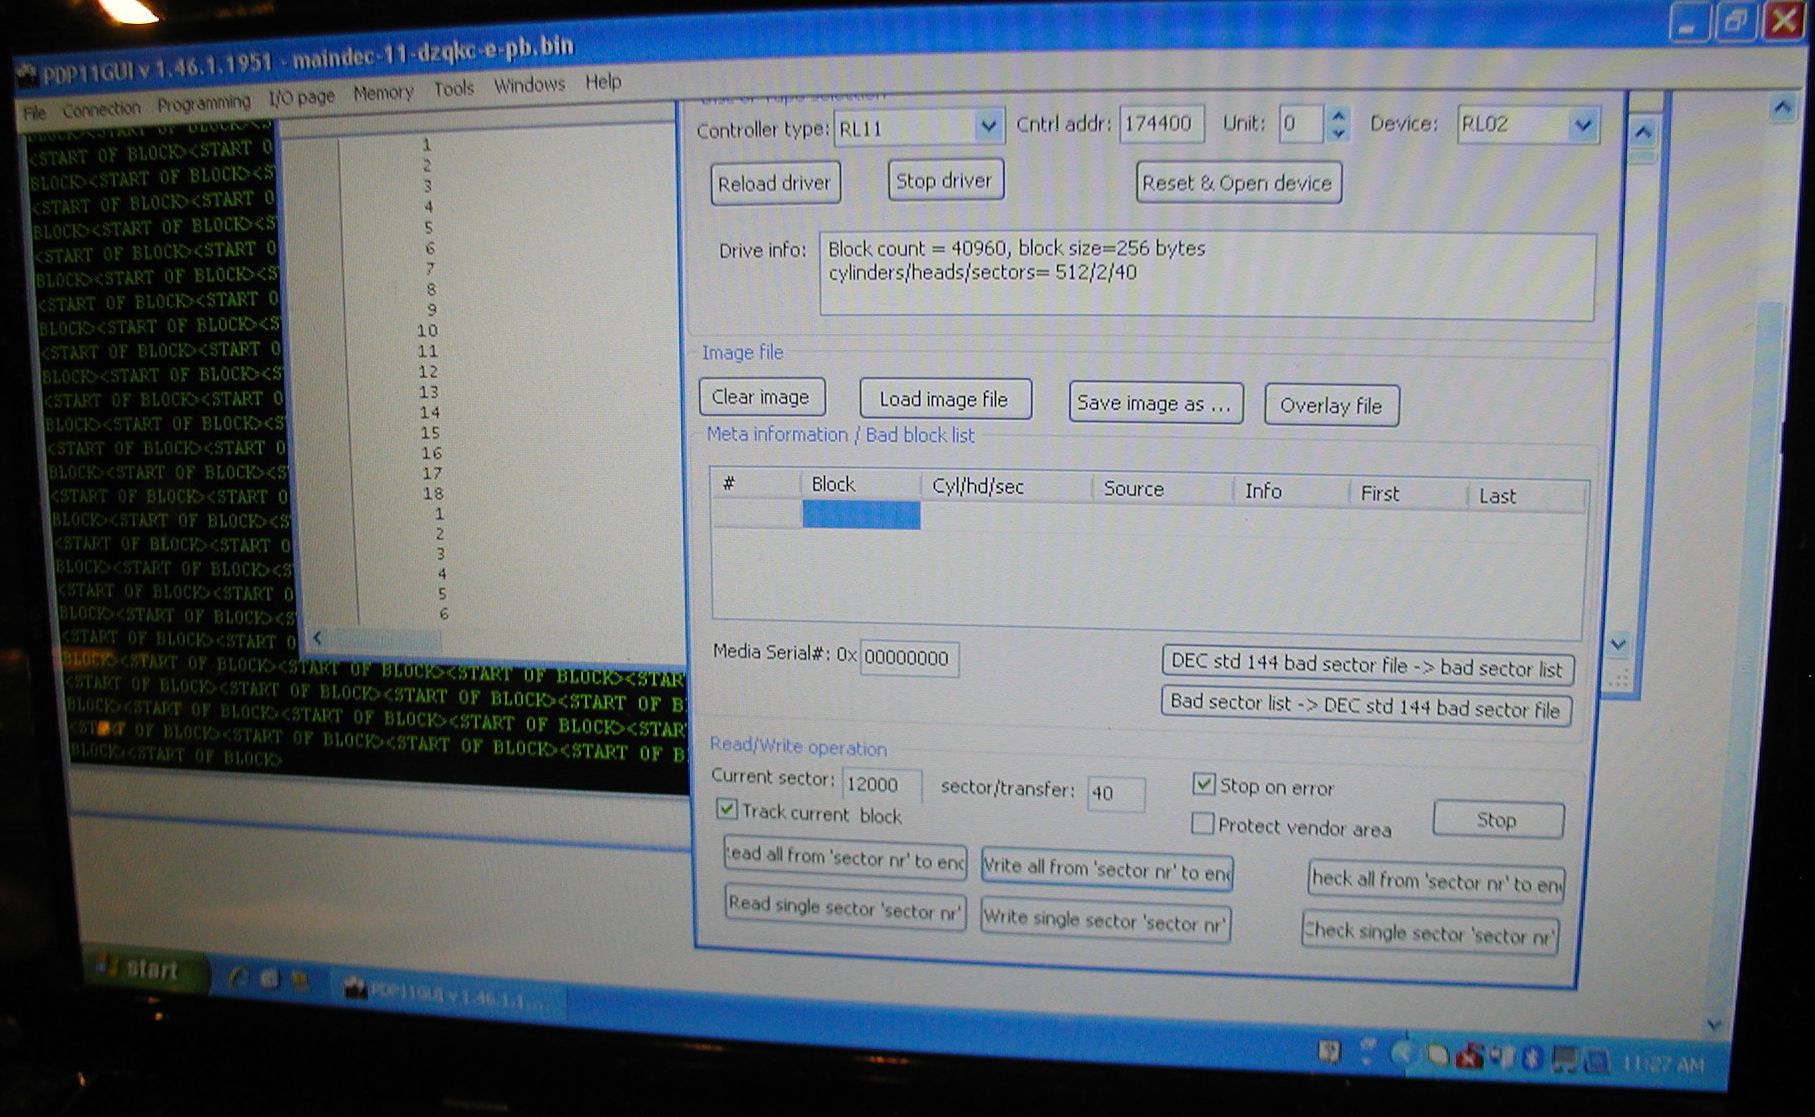 Here is a photo of my MS XP laptop screen running PDPGUI 1.46, an older version. The window in the back shows the terminal output. Note the "START OF BLOCK" messages for each new sector written to the disk. You can also see from the foreground window that the copy is at sector 12000. Once you get to this point the process speeds up. I assume this is due to free space on the disk image. Click photo for larger view and to see the settings in more detail.
5. To copy the RL02 image file to an actual physical RL02 disk. Fire up PDPGUI and use the Tools --> Read/write disk images utility. This program runs under Windows (laptop). I attached a USB to serial cable from the computer to my PDP 11/40 DL card. The PDP 11 also has an M9312 ROM monitor. Attached to the PDP RL controller are 2 RL02 drives. Note that you have to play around a little with the PDPGUI disk building process. I am writing this description from memory, I will edit next time I run it. These are the steps I follow, you may know another way. Make sure your system is up and running and your drive is ready to be written to before you start PDPGUI. Within PDPGUI first open the terminal window and make sure you're ok and can interact witH the monitor program. You can use the monitor to watch the progress of the disk build. Open the "read write disk images" utility: a. First set the controller type, unit, device b. [Reload Driver] button c. [reset and open device ] button..This will open a window to load the actual copy program on the PC, and then a a 2nd MACRO-11 window that opens and.downloads the program that needs to be run on the PDP11, you can watch the progress via the terminal window. d. Once the load completes, you'll see the first START OF BLOCK printed on the terminal, that means you're ready to go, the system is waiting for you to start the operation. e. Choose the disk image using the Load Image File button f. Scroll down to the bottom of the window. g. "current sector" = 0 Check the watch progress and stop on error check boxes. Locate the the top middle button to write the image [write all from sector n to end]. You'll see activity on both the terminal and your front panel. The drive light will blink once for each sector block. NOTE: On the real PDP-11 You might need to run the following after booting. >RED DL:=SY: >RED DL:=LB: >MOU DL:RSXM32 >@DL:[1,2]STARTUP ---------------- If you find any errors in this document, please contact me. Reply |
|
 Adding PDP 11 Programming
 |
by Bill Degnan - 11/14/2017 13:07 |
|
Notes to self - see simH/PDP11/ folder for next steps. Assembly and Fortran RL02 diskpacks, set up. I have some new real RL02s that have Fortran already to compare with but I want to add in the games disk files too below.
> https://lab.dyne.org/OriginalTetrisHowto/Hybrid > > http://pdp-11.org.ru/~form/rtgames/ Reply |
|
Resources:

Popular Topics and FAQs
Past Issues:
Before we switched over to a blog format, past page archives here:
Vintage Computer Festival East 3.0 June 2006
Commodore B Series Prototypes July 2006
VOLSCAN - The first desktop computer with a GUI? Oct 2006
ROBOTS! - Will Robots Take Over? Nov 2006
Magnavox Mystery - a Computer, or? Jan 2007
The 1973 Williams Paddle Ball Arcade Computer Game Feb 2007
The Sperry UNIVAC 1219 Military Computer May 2007
VCF East 2007 - PET 30th Anniversary June/July 2007
The Electronic Brain August 2007
Community Memory and The People's Computer Company October 2007
Charles Babbage's Calculating Machine December 2007
Vintage Computing - A 1983 Perspective February 2008
Laptops and Portables May 2008
From Giant Brains to Hobby Computers - 1957 to 1977 August 2008
Historic Computer Magazines November 2008
World's Smallest Electronic Brain - Simon (1950) December 2008 - Feb 2009
Free Program Listings Spring 2009
Computer Music Summer 2009
Popular Electronics Jan/Feb 1975 - Altair 8800 Fall 2009
Early Microcomputer Mass Storage Summer 2010
HOPE9 Heathkit ET 3400
This image was selected at random from the archive. Click image for more photos and files from this set.