CONTENTS INTRODUCTION...................................1 MEDIA AND DISK DRIVE REQUIREMENTS..............2 REQUIRED ACCESORIES............................3 TESTING YOUR INTERFACE.........................4 INSTALLATION INSTRUCTIONS......................5 RADIO SHACK EXPANSION INTERFACE..............6 OLDER VERSION OF THE EXPANSION INTERFACE...7 NEWER VERSION OF THE EXPANSION INTERFACE..11 LNW RESEARCH SYSTEM EXPANSION...............15 ASSEMBLED AND TESTED......................15 KIT FORM..................................18 POWERING UP THE FIRST TIME....................19 CONNECTING EIGHT INCH DRIVES..................20 TROUBLESHOOTING...............................22 THEORY OF OPERATIONS..........................26 FD179X-02 FLOPPY CONTROLLER DATA..............28 WD1692 FLOPPY SUPPORT LOGIC DATA..............44 FD179X APPLICATION NOTES......................47 ALIGNMENT.....................................53 ACCESORY ORDERING INFORMATION.................54 LIMITED WARRANTY..............................55 ACKNOWLEDGEMENTS..............................56 APPENDIX 1.0 USING NEWDOS 2.0.................57
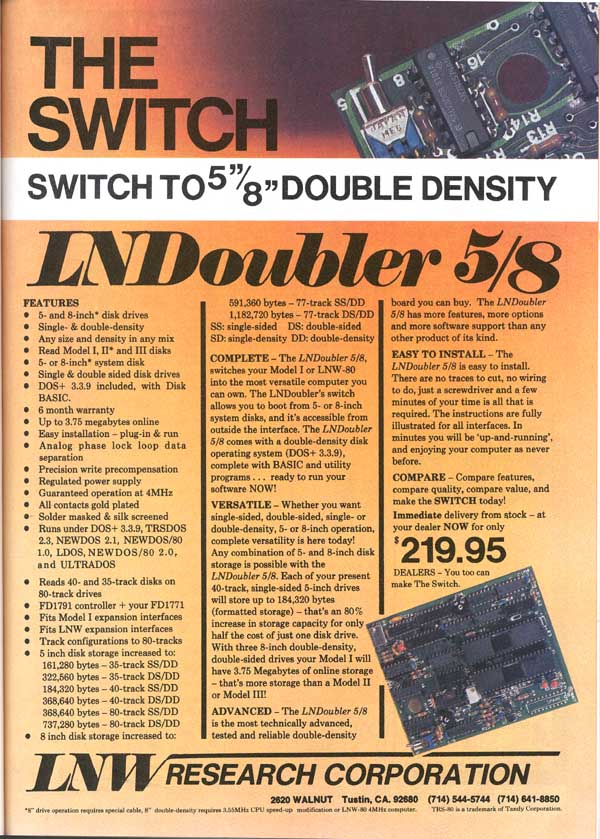
The LNDOUBLER 5/8 switches your TRS80* MODEL I or LNW80 computer into the most versatile computer you can own.Whether you want single sided,double sided,single or double density, 5 or 8 inch disk operating, any combination of disk storage is possible with the LNDOUBLER 5/8. Each of your present 40 track single sided disk drives will store up to 184.320 bytes (formatted)-thats an 80% increase! The LNDOUBLER 5/8 even allows you to BOOT from an 8" system disk with a flip of a switch.The LNDOUBLER 5/8 is compatible with all software available for 5" single and double density,8" single and double density written for the TRS80. The LNDOUBLER 5/8 is easy to install.There are no traces to cut,no soldering or wiring.Just unplug the floppy controller IC (FD1771) from your interface,install the FD1771 into the LNDOUBLER 5/8,and just plug the LNDOUBLER 5/8 into the interface.In just a few minutes you'll be enjoying your computer as never before. The LNDOUBLER 5/8 is the most technically advanced,tested and reliable double density board you can own.The LNDOUBLER 5/8 has more features,more capabilities, and more software support than any product of it's kind. FEATURES * RELIABLE OPERATION GUARANTEED WITH ALL 5.25" AND 8" DISK DRIVES * SINGLE AND DOUBLE DENSITY OPERATION * 5.25" AND 8" IN ANY MIX * READ MODEL I,II,III DISKS * 5.25" AND 8" SYSTEM DISKS * ANALOG PHASE LOCK LOOP DATA SEPARATION * PRECISION WRITE PRECOMPENSATION * REGULATED SUPPLY FOR VCO AND ALIGNMENT CIRCUITS * GUARANTEED OPERATION WITH ALL TRS80 EXPANSION INTERFACE UNITS * ALL GOLD CONTACTS * GUARANTEED OPERATION AT 4.0 MHZ CPU SPEED * EASY INSTALLATION * COMPATIBLE WITH ALL SINGLE,DOUBLE AND 8" DRIVE SOFTWARE * FIVE INCH DISK STORAGE INCREASED TO : 161,280 bytes- 35 track ss/dd 322,560 bytes- 35 track ds/dd 184,320 bytes- 40 track ss/dd 368,640 bytes- 40 track ds/dd 368,640 bytes- 80 track ss/dd 737,280 bytes- 80 track ds/dd * EIGHT INCH DISK STORAGE INCREASED TO: 335,104 bytes- 77 track ss/dd 670,208 bytes -77 track ds/dd 591,360 bytes -77 track ss/dd 1,182,720 bytes -77 track ds/dd ss: single density ds: dual sided sd: single density dd: double density -1-
MEDIA AND DRIVE REQUIREMENTS Since the LNDOUBLER 5/8 will work with virtually any drive and any media, it may be tempting to use (for example) low cost single density single sided 35 track diskettes with 80 track,double density double sided drives.On the other hand, experimentation to find out which diskettes work the best, may lead to the conclusion that any diskettes wil work. For this reason we at LNW RESEARCH make the following suggestions: 1.Use double density rated disk drives. Single density drives may work, but the proper operation in double density cannot be guaranteed for the life of the drive. 2.use diskettes rated according to their use 3.Check diskettes for wear periodically 4.Clean and align your disk drive(s) according to the manufacturer's recommendations. -2-
REQUIRED ACCESORIES FOR 5" DOUBLE DENSITY,8" AND SPECIAL SOFTWARE APPLICATIONS All existing TRS80 MOD I single density software will run unmodified in SINGLE DENSITY with the LNDOUBLER 5/8 installed. In order to use double density and 8" drive capabilities, special software is required. In order to connect an eight inch disk drive to your system, a special cable adapter circuit board and an eight inch disk drive cable (50 cond.) is required. Some eight inch disk drive software requires a special "wait cable" (#stk# 1097). Some eight inch disk drives require that the "write current" line on the disk drive be driven when using these drives in double density above track 43.In order to do this another small cable is needed. This cable is called the "TG43 CABLE" (stk#1097).Shugart Disk drives DO NOT NEED THIS CABLE.Check the data sheets on your drive to determine if your drive needs this signal. The hardware/software configuration information is summarized in the following table,and ordering information for the various accessories is included at the rear of the manual DOS 5.25" SD 5.25" DD 8" SD 8" DD Dosplus 3.2d X S Dosplus 3.38d X S X(1) X(1,4) Dbldos X S F.E.C. T8/OS S X(1,2) LDOS 5.0 S S Omikron CP/M S S(1,2) Newdos80 1.0 S S(3) X(1,2) Newdos80 2.0 S S S(1) X(1,4) Vtos 4.0 S S(3) NOTES: X= non system disk S= system sisk or non systen disk 1= requires 8" cable adapter (stk#1096) and 8" drive cable (stk#1099) 2= requires "wait cable" (stk#1097) 3= requires Double Zap II from Software etc. 4= requires CPU speed to > 3.5 mhz or LNW80 computer SEE PAGE 21 for details concerning speed up kits -3-
_______________ SPECIAL NOTE_________________________ BEFORE ATTEMPTING TO INSTALL THE LNDOUBLER 5/8 INTO YOUR INTERFACE, MAKE SURE THAT YOUR INTERFACE IS FUNCTIONING PROPERLY. OPENING YOUR INTERFACE DURING THE LIMITED 90 (100 FOR LNW INTERFACE) DAY WARRANTY PERIOD MAY VOID YOUR WARRANTY. EXERCISE YOUR WARRANTY RIGHTS IF NECESSARY PRIOR TO INSTALLING THE LNDOUBLER _______________________________________________________ TEST YOUR INTERFACE To test your interface and provide a "test diskette" for our initial power up of the LNDOUBLER 5/8,make a "backup" of a single density DOS SYSTEM disk.DO NOT attempt to BOOT the double density system disk (Dosplus) without the LNDOUBLER 5/8 installed. If you are not able to correctly backup a single density SYSTEM disk DO NOT attempt to install the LNDOUBLER 5/8. It cannot fix defective interface units! After backing up the single density SYSTEM disk attempt to BOOT this disk. If it boots correctly set it aside for the initial power up with the LNDOUBLER 5/8. Proceed to INSTALLATION INSTRUCTIONS. -4-
INSTALLATION INSTRUCTIONS TOOLS REQUIRED: Small slotted screwdriver Medium phillips screwdriver Needle nose pliers or tweezers Large clean work space
 ________________CATION__________________________
THE FD1771 FLOPPY CONTROLLER IC WHICH YOU WILL
BE REQUIRED TO HANDLE DURING THE INSTALLATION
OF THE LNDOUBLER 5/8 IS SENSITIVE TO STATIC
ELECTRICITY AND CAN EASILY BE DAMAGED BY A
STATIC DISCHARGE. BREAKING THE PINS OF THE FD1771
WILL ALSO CAUSE PERMANENT DAMAGE TO THE PART.
WE MAKE THE FOLLOWING RECOMMANDATION CONCERNING THE
HANDLING OF THE FD1771:
1. Work in an area that is NOT CARPETED
2. Do not wear clothes that will generate static
3. Have all tools close at hand before handling the
FD1771
4. Use great care when removing and installing the
FD1771 to not bend or break the delicate pins
_____________________________________________________
Installation instructions are provided for the two different
expansion interface units for the TRS80- the Tandy and the LNW
interface.
-5-
________________CATION__________________________
THE FD1771 FLOPPY CONTROLLER IC WHICH YOU WILL
BE REQUIRED TO HANDLE DURING THE INSTALLATION
OF THE LNDOUBLER 5/8 IS SENSITIVE TO STATIC
ELECTRICITY AND CAN EASILY BE DAMAGED BY A
STATIC DISCHARGE. BREAKING THE PINS OF THE FD1771
WILL ALSO CAUSE PERMANENT DAMAGE TO THE PART.
WE MAKE THE FOLLOWING RECOMMANDATION CONCERNING THE
HANDLING OF THE FD1771:
1. Work in an area that is NOT CARPETED
2. Do not wear clothes that will generate static
3. Have all tools close at hand before handling the
FD1771
4. Use great care when removing and installing the
FD1771 to not bend or break the delicate pins
_____________________________________________________
Installation instructions are provided for the two different
expansion interface units for the TRS80- the Tandy and the LNW
interface.
-5-
TANDY INTERFACE Disconnect the interface from the computer. Unplug the interface from the AC power, disconnect all cables from the interface (printer,RS232,and floppy disk,etc.). Turn the interface upside down such that the rubber feet face upward. You will notice six (6) phillips-head screws recessed into the plastic bottom of the interface case. Loosen each screw completely but don't remove them from the bottom panel. Carefully lift the entire bottom panel away and set it beside the interface exercising care not to lose the mounting screws. Note that the screws are of different lengths.
 Refer to the following photographs to identify your type
of expansion interface. There are two different designs from
Tandy ,the one on the left was their original interface, hence
"OLD" and th one on the right is teh newer of their designs
and we refer to it as "NEW". Proceed to instructions provided
for the type of interface which you own.
Refer to the following photographs to identify your type
of expansion interface. There are two different designs from
Tandy ,the one on the left was their original interface, hence
"OLD" and th one on the right is teh newer of their designs
and we refer to it as "NEW". Proceed to instructions provided
for the type of interface which you own.
 -6-
-6-
OLD EXPANSION INTERFACE Observe the location of the floppy controller IC (the large black IC with 40 pins marked FD1771)located at position Z34. Note that the "notch" on the IC faces the center of the circuit board.
 Carefully remove the the FD1771 by inserting the small
screwdriver between the FD1771 and the socket that it is
installed in, and pry it gently on each side. Refer to the
following photos.
Carefully remove the the FD1771 by inserting the small
screwdriver between the FD1771 and the socket that it is
installed in, and pry it gently on each side. Refer to the
following photos.
 -7-
-7-
Should a lead become bent as in the next photo, use the pair of needle nose pliers or tweezers to carefully bend the pins back in place. Do not use excessive force or bend the lead back and forth too many times as the leads are delicate and can easily break.
 Now install the FD1771 in the socket (IC10) provided on the
LNDOUBLER 5/8.
Use extreme care to insure that all 40 pins seat properly
into the socket. The notch on the FD1771 should face the
outside of the LNDOUBLER 5/8.
Inspect the seating of the FD1771 in its socket by holding
the LNDOUBLER 5/8 board with the notch side of the 1771 facing
you. Look between the bottom of the IC and the top of the
socket and inspect the two rows of pins of the IC. If a pin is
bent, carefully remove the FD1771 and bend the lead straight
with the needle nose pliers or the tweezers. Reinstall the
FD1771 into the socket.
Now install the FD1771 in the socket (IC10) provided on the
LNDOUBLER 5/8.
Use extreme care to insure that all 40 pins seat properly
into the socket. The notch on the FD1771 should face the
outside of the LNDOUBLER 5/8.
Inspect the seating of the FD1771 in its socket by holding
the LNDOUBLER 5/8 board with the notch side of the 1771 facing
you. Look between the bottom of the IC and the top of the
socket and inspect the two rows of pins of the IC. If a pin is
bent, carefully remove the FD1771 and bend the lead straight
with the needle nose pliers or the tweezers. Reinstall the
FD1771 into the socket.
 -8-
-8-
Prepare to install the LNDOUBLER 5/8 by inspecting the area on the interface near the socket and observe the area for components which might obstruct installation. Carefully reposition any components. Remove the protective foam block on the pins of the LNDOUBLER 5/8. Position the LNDOUBLER 5/8 into the socket. Refer to the following photo.
 Note that there is a small round hole on the LNDOUBLER 5/8
which allows a support on the expansion interface case to fit
through.
Gently press the LNDOUBLER 5/8 into the socket. Now inspect
the installation of the LNDOUBLER 5/8 making sure that all the
pins are seated in the socket. If the LNDOUBLER 5/8 will not
seat properly due to obstruction by a component which cannot
be repositioned easily,it may be necessary to RAISE the
LNDOUBLER 5/8 in its socket. This can be accomplished by
installing a 40 pin dip IC socket between the LNDOUBLER 5/8
pins and the IC socket on the expansion interface.
Note that there is a small round hole on the LNDOUBLER 5/8
which allows a support on the expansion interface case to fit
through.
Gently press the LNDOUBLER 5/8 into the socket. Now inspect
the installation of the LNDOUBLER 5/8 making sure that all the
pins are seated in the socket. If the LNDOUBLER 5/8 will not
seat properly due to obstruction by a component which cannot
be repositioned easily,it may be necessary to RAISE the
LNDOUBLER 5/8 in its socket. This can be accomplished by
installing a 40 pin dip IC socket between the LNDOUBLER 5/8
pins and the IC socket on the expansion interface.
 -9-
-9-
Before closing up, note the switch on the outside corner of the LNDOUBLER 5/8. It is accesible from the outside of the interface, but you must make sure you know what position it is set to before closing up the interface. SET THE SWITCH TO THE "5" POSITION. A detailed explanation of the operation of this switch is included in a later section of this manual. Now carefully position the case bottom panel over the interface, guiding the 6 screws into their 6 plastic supports on the case. Tighten the 6 screws completely. Observe the opening in the interface that the 5/8 switch is visible. Using some sort of label or tape, mark the outside of the case in such a way as to identify the setting of the switch for the "5" position. Proceed to the section entitled "POWERING UP THE FIRST TIME". -10-
NEW EXPANSION INTERFACE Note the location of the floppy controller IC (FD1771),the large black 40 pin IC at location Z42. The notch on the FD1771 should face Z41 and the connector for the floppy drives.
 Carefully remove the the FD1771 by inserting the small
screwdriver between the FD1771 and the socket that it is
installed in, and pry it gently on each side. Refer to the
following photos.
-11-
Carefully remove the the FD1771 by inserting the small
screwdriver between the FD1771 and the socket that it is
installed in, and pry it gently on each side. Refer to the
following photos.
-11-
Should a lead become bent as in the next photo, use the pair of needle nose pliers or tweezers to carefully bend the pins back in place. Do not use excessive force or bend the lead back and forth too many times as the leads are delicate and can easily break.
Now install the FD1771 in the socket (IC10) provided on the
LNDOUBLER 5/8.
Use extreme care to insure that all 40 pins seat properly
into the socket. The notch on the FD1771 should face the
outside of the LNDOUBLER 5/8.
Inspect the seating of the FD1771 in its socket by holding
the LNDOUBLER 5/8 board with the notch side of the 1771 facing
you. Look between the bottom of the IC and the top of the
socket and inspect the two rows of pins of the IC. If a pin is
bent, carefully remove the FD1771 and bend the lead straight
with the needle nose pliers or the tweezers. Reinstall the
FD1771 into the socket.
-12-
Prepare to install the LNDOUBLER 5/8 by inspecting the area on the interface near the socket and observe the area for components which might obstruct installation. Carefully reposition any components. Remove the protective foam block on the pins of the LNDOUBLER 5/8. Position the LNDOUBLER 5/8 into the socket. Refer to the following photo.
Gently press the LNDOUBLER 5/8 into the socket. Now inspect
the installation of the LNDOUBLER 5/8 making sure that all the
pins are seated in the socket. If the LNDOUBLER 5/8 will not
seat properly due to obstruction by a component which cannot
be repositioned easily,it may be necesary to raise the
LNDOUBLER 5/8 in its socket. This can be accomplished by
installing a 40 pin dip IC socket between the LNDOUBLER 5/8
pins and the IC socket on the expansion interface.
 -13-
-13-
Before closing up, note the switch on the outside corner of the LNDOUBLER 5/8. It is accesible from the outside of the interface, but you must make sure you know what position it is set to before closing up the interface. SET THE SWITCH TO THE "5" POSITION. A detailed explanation of the operation of this switch is included in a later section of this manual. Now carefully position the case bottom panel over the interface, guiding the 6 screws into their 6 plastic supports on the case. Tighten the 6 screws completely. Observe the opening in the interface that the 5/8 switch is visible. Using some sort of label or tape, mark the outside of the case in such a way as to identify the setting of the switch for the "5" position. Proceed to the section entitled "POWERING UP THE FIRST TIME". -14-
LNW SYSTEM EXPANSION (ASSEMBLED) Remove the two top mounting and two bottom mounting screws which secure the case top to the SYSTEM EXPANSION base. Remove the case top gently, noting that the front panel LED pilot lamp is wired to the system expansion circuit board. Position the case top upside down beside the chassis base. Remove the four circuit board mounting screws locate on the edges of the system expansion circuit board. gently position the circuit board component side up and remove the polarized power supply connector at J1 (near the large capacitors). Remove the circuit board away from the chassis and set it down on the inside of the top panel with the component side up. Since the componemt leads are sharp, handle the board with care and only at the edges. Also do not set the board down on any delicate surface or furniture as scratches will result. Note the location of the floppy controller IC at U14. The "notch" on the 1771 should face C22 or the inside of the circuit board. See below:
 -15-
-15-
Carefully remove the the FD1771 by inserting the small screwdriver between the FD1771 and the socket that it is installed in, and pry it gently on each side. Refer to the following photo .
 Should a lead become bent as in the next photo, use the
pair of needle nose pliers or tweezers to carefully bend the
pins back in place. Do not use excessive force or bend the
lead back and forth too many times as the leads are delicate
and can easily break.
-16-
Should a lead become bent as in the next photo, use the
pair of needle nose pliers or tweezers to carefully bend the
pins back in place. Do not use excessive force or bend the
lead back and forth too many times as the leads are delicate
and can easily break.
-16-
Now install the FD1771 in the socket (IC10) provided on the LNDOUBLER 5/8. Use extreme care to insure that all 40 pins seat properly into the socket. The notch on the FD1771 should face the outside of the LNDOUBLER 5/8. Inspect the seating of the FD1771 in its socket by holding the LNDOUBLER 5/8 board with the notch side of the 1771 facing you. Look between the bottom of the IC and the top of the socket and inspect the two rows of pins of the IC. If a pin is bent, carefully remove the FD1771 and bend the lead straight with the needle nose pliers or the tweezers. Reinstall the FD1771 into the socket.
Prepare to install the LNDOUBLER 5/8 by inspecting the area
on the interface near the socket and observe the area for
components which might obstruct installation. Carefully
reposition any components. Remove the protective foam block on
the pins of the LNDOUBLER 5/8. Position the LNDOUBLER 5/8 into
the socket. Refer to the following photo.
-17-
Gently press the LNDOUBLER 5/8 into the socket. Now inspect the installation of the LNDOUBLER 5/8 making sure that all the pins are seated in the socket. If the LNDOUBLER 5/8 will not seat properly due to obstruction by a component which cannot be repositioned easily,it may be necesary to RAISE the LNDOUBLER 5/8 in its socket. This can be accomplished by installing a 40 pin dip IC socket between the LNDOUBLER 5/8 pins and the IC socket on the expansion interface. Before closing up, note the switch on the outside corner of the LNDOUBLER 5/8. It is accesible from the outside of the interface, but you must make sure you know what position it is set to before closing up the interface. SET THE SWITCH TO THE "5" POSITION. A detailed explanation of the operation of this switch is included in a later section of this manual. Reconnect the power supply connector at J1 noting that the correct way to connect J1 is such that the connector "locks" in place. Position the circuit board back in place with the component side down. Reinstall the for circit board mounting screws. Note that their should be three screws with washers and one without. The one without is the one closest to the RS232 BAUD rate configuration area. Position the case top back on top of the chassis,install the top and bottom support screws. Observe the opening in the interface that the 5/8 switch is visible. Using some sort of label or tape, mark the outside of the case in such a way as to identify the setting of the switch for the "5" position. Proceed to the section entitled "POWERING UP THE FIRST TIME". LNW SYSTEM EXPANSION (KIT FORM) Follow the instructions as for the assembled and test unit but it WILL be necessary to obtain and install a 40 pin dip IC socket as a spacer between the LNDOUBLER 5/8 and the interface socket if sockets were used in any of the IC's surrouding U14. -18-
____________________CAUTION________________________ DO NOT INSTALL A DOUBLE DENSITY SYSTEM DISK INTO THE DISK DRIVE AT THIS TIME!!! PROPER OPERATION UNDER SINGLE DENSITY MUST BE ESTABLISHED PRIOR TO ATTEMPTING TO BOOT THE DOUBLE DENSITY (DOSPLUS) SYSTEM DISK. INSTALLING YOUR ONLY COPY OF A DOUBLE DENSITY SYSTEM DISK WHEN PROPER INSTALLATION HAS NOT BEEN ESTABLISHED MAY LEAD TO NEEDLESS FRUSTRATION AND DELAY _______________________________________________________ Reconnect power, your cpu (keyboard,and floppy cable to your interface. Do not connect a printer or RS232 cable until proper operation has been established below. Power your drives, the interface and insert the SINGLE DENSITY SYSTEM DISK that you created while testing your interface into your drive 0. Turn on the CPU If the SINGLE DENSITY disk boots correctly, replace the single density disk with the DOUBLE DENSITY system disk. Reset the CPU If the disk boots correctly, proceed to make a backup ot the Double density system disk. If it backs up correctly, proceed to connect the rest of your peripherials and enjoy the most reliable double density operation possible! If any problems occur, turn the system off and proceed to the section of the manual entitled "TROUBLESHOOTING". -19-
CONNECTING EIGHT INCH DISK DRIVES Eight inch disk drives which are SHUGART compatible can easily be connected to an expansion interface or SYSTEM EXPANSION with the LNDOUBLER 5/8 installed. A special cable adaptor board which converts the 34 conductor 5.25" floppy cable to the 50 conductor 8" drive cable is available from LNW RESEARCH CORPORATION ,stk#1096. One end of the adaptor board plugs into your 5" drive cable (cable with no pins pulled) and the other end of the adaptor plugs into your 8" drive cable, thus interfacing the 8" drive(s) to yor system. The adaptor board also has a connection for the "TG43" or write current line which may be needed if your 8" drive requires it. If it is needed , it may be ordered from LNW. The 8" drive , 4-disk cable is also available from LNW. Since all 8" disk drives are not the same compare the following chat with the pinouts for the drive that you plan to be using. The following chart also shows the simularities between the 5" and 8" disk drive interface lines. PIN # PIN # 5" SIGNAL 8" SIGNAL 2-ground (write current) 4-not used 6-not used 8-not used 10-two sided (not used) 12-disk change (not used) 14-side select 16-activity indicator 2-not used 18-head load (not used) 4-not used 20-index 6-not used 22-ready (not used) 8-index 24-not used 10-drive select 1 26-drive select 1 12-drive select 2 28-drive select 2 14-drive select 3 30-drive select 3 16-motor on 32-motor on 18-direction select 34-direction select 20-step 36-step 22-write data 38-write data 24-write gate 40-write gate 26-track 0 42-track 0 28-write protect 44-write protect 30-read data 46-read data 32-drive select 4/side select 48-not used 34-not used 50-not used -20-
WAIT STATE CABLE If you intend to run operating systems other than DOSPLUS 3.38 and NEWDOS80 2.0 with 8" drive support, you may need the special "WAIT CABLE" wired from the "wait pin" on the LNDOUBLER 5/8 to pin 33 of the screen printer bus. This line causes the CPU to wait in order to pick up the data correctly while doing disk I/O. Since improvements have been made in the operating systems as far as the disk I/O is concerned,it has been found that the 1.77mhz cpu speed is adequate to handle the data rate of the 8" disk drive without any special hardware. Hopefully the operating systems which have in the past required this logic, will rewrite their disk I/O routines to eliminate this unnecesary cable. The "WAIT CABLE" IS AVAILABLE from LNW RESEARCH. Order information is included in the rear of this manual. EIGHT INCH DISK DRIVE OPERATION If you want to use 8" disk drives, either mixed with 5" drives or only with 8" drives make sure that 5" operation is assured. After connecting the 8" disk drive to your system as described , attempt to format an 8" disk drive. If it formats correctly, flip the 5/8 switch in the rear and boot an 8" system disk, reconfiguring your drives so as to have an 8" drive as drive 0. If it works, set up your drives and the 5/8 switch as you would like and enjoy the increased density and reliability of eight inch disk drives! If problems result, consult the section in the manual entitled"TROUBLESHOOTING". INSTALING A SPEED UP KIT IN YOUR TRS80 Changing the speed of the CPU in a TRS80 involves more than just changing the Z80 to a Z80A. It involves soldering,wiring and a comprehensive plan to obtain the correct timing for the 4116 memory components in the INTERFACE as well as in the CPU . The speed up kit required to run 8" double density must be at least twice the standard speed,and MUST NOT return to the slow speed under disk I/O. One such speed up kit is available from: ARCHBOLD ELECTRONICS 10708 Segovla Way Rancho Cordova CA 95670 We do not recommend such a speed up kit for someone who does not have a certain degree of technical skill in electronics and is proficient in soldering. For further details concerning the installation of speed up kits and other modifications to the TRS80 we recommend the following book: THE CUUSTOM TRS80 and other mysteries by Dennis Kitsz available from- IJC COMPUTER SERVICES 1260 West Foothill blvd Upland CA 91786 -21-
TROUBLESHOOTING We have included a list of symptoms and possible solutions to aid in the search for your problem. Most common problems occur from hasty late night installations. Try everything imaginable bfore coming to the conclusion that LNDOUBLER 5/8 is at fault. We will be glad to assist you in problems concerning the installation of the LNDOUBLER 5/8. We cannot help you with custom installations nor can we install your LNDOUBLER 5/8 for you. We cannot help you in determining if your 8" disk drive will work with the LNDOUBLER 5/8 nor can we recommend ways to modify 8" disk drives which are not SHUGART compatible.If you are having problems with configuring your 8" disk drive, contact the manufacturer or dealer that sold the drive.We cannot help you with problems related to your 8" drives unless you are using the cables and the cable adaptors which WE manufacture! We will not talk to you about wiring the LNDOUBLER 5/8 to other computers or other interfaces. ( ie.MOD III or PMC80) HERE ARE SOME OF THE COMMON PROBLEMS SYMPTOM: Single density DOS disk won't boot. Motor turns on, drive light turns on...then turns off. PROBABLE CAUSE: 1. 5/8 switch set to 8" position 2. Defective single density disk 3. Improper power up procedure, power up again 4. FD1771 improperly installed in LNDOUBLER 5/8 5. Improper installation of the LNDOUBLER 5/8 SYMTOM: Nothing happens on power up .Computer displays "memory size?" or similar message. PROBABLE CAUSE: 1. Expansion interface not powered up 2. LNDOUBLER 5/8 improperly installed SYMTOM: Single density disk boots but double density operating system disk will not boot or does not function. PROBABLE CAUSE: 1. Defective double density system disk...Contact your dealer abot receiving a new copy. 2. Improper termination of your disk drives. -22-
SYMPTOM: Single and Double density disks boot correctly but will not back up or write to disk in any density. PROBABLE CAUSE: 1. More than one disk drive with termination resistors installed.Last disk drive on cable should have the termination resistor packs. 2. Improper installation of LNDOUBLER 5/8 (may have a pin on the doubler bent) 3. defective FD1771 IC SYMPTOM: Double density operation is correct but will not format, backup or write to disk correctly in single density. PROBABLE CAUSE: 1. Improper installation of FD1771 2. Defective FD1771 SYMPTOM: 5" single and double density operation is correct,but 8" drives will not function. PROBABLE CAUSE: 1. Improper configuration of 8" disk drive 2. Improper termination of 8" disk drive 3. 8" disk drive cabling defective 4. Configuration of 8" disk drive wrong SYMPTOM: 8" disk drive operation in single density is correct but double density 8" will not work. PROBABLE CAUSE: 1.Attempting to run 8" double density on an unmodified TRS-80 (1.77 mhz CPU speed) 2.Speed up kit forces low cpu speed (1.77mhz) during disk I/O 3.Speed up kit does not bring the CPU up to 3.55 mhz SYMPTOM: 8" single density will not operate under OMIKROM CP/M or NEWDOS80 1.0. PROBABLE CAUSE: 1."WAIT CABLE" not installed between LNDOUBLER 5/8 and pin 33 of the screen printer bus. -23-
SYMPTOM: DOSPLUS 3.3 will not boot PROBABLE CAUSE: 1. The original DOSPLUS 3.3d is not compatible with the LNDOUBLER 5/8 in ANY FORM, although DOSPLUS 3.2d is compatible in double density with 5" drives only.Although you cannot boot,or use any of the utilities of the DOSPLUUS 3.3d you can copy or transfer all your programs or data from the 3.3 disk to your new 3.38 system disk. SYMPTOM: Problems occur in double density 8" in the upper tracks. PROBABLE CAUSE: 1. Above track 43 the write current must be lowered on some 8" disk drives. If the drives you have has a signal called "write current switch" then the "TG43" cable must be installed between the LNDOUBLER 5/8 and the 8" disk adaptor board. 2. Diskettes not rated for double density operation SYMPTOM: When attempting to write on a 8" disk, the DOS error indicates that the disk is "WRITE PROTECTED". PROBABLE CAUSES: 1.8" disk drives have the opposite convention for WRITE PROTECT. The write protect tab must be installed IN ORDER TO WRITE ON THE DISK. -24-
RETURNING YOUR LNDOUBLER 5/8 FOR REPAIR If you cannot get yor LNDOUUBLER 5/8 to function properly within the warranty period, you may elect to return the LNDOUBLER 5/8 to your dealer for replacement (usually the fastest remedy) or you may return it to the factory for repair(provided you filled out the warranty registration and provide proof of purchase from an authorized dealer of LNW RESEARCH CORPORATION).Give our Service Department a call before returning it so a technichian can try and help you over the phone. If the LNDOUBLER 5/8 is out of warranty then call the factory and return the defective unit for repair.Sevice rates will be given to you over the phone at the time you call. When returning anything to the factory for repair be sure to: 1. Pack it properly with plenty of padding 2. Ship it prepaid UPS or insured PARCEL POST 3. Enclose a complete description of the problem 4. Warranty unts should include PROOF OF PURCHASE ___________________NOTE________________________________ Problems concerning the operation of the operating system diskette supplied with the LNDOUBLER 5/8 as well as its updates should be directed to the authors of the operating system . ________________________________________________________ -25-
THEORY OF OPERATION The LNDOUBLER 5/8 has as it's heart two floppy controller IC's- the FD1771 (single density controller) and the FD1791 (single and double). The reason that the 1771 is still needed when the 1791 can do single density operation is that the commands are slightly different and the BOOT in the level 2 ROMs would not work. And since we want to stay 100% software compatible we keep the FD1771. The two floppy controller IC's are tied together so only one of the two can be enabled at one time.We turn on the 1771 when we do single density disk I/O and we enable the 1791 for double density operation. To switch from 5.25" disk drives to 8" inch disk drives we must change the frequency of the clock going into the 1771 and 1791 and do some other switching of signals. A software switch is also provided for this. In addition there exists some special "wait state logic" which allows 8" disk drive operation under a slow CPU speed.This logic is used by several operating system and is maintained for compatibility reasons.It may also be fouund that this logic can be used for 8" double density operation with a 1.77mhz cpu speed. The software switch locations are summarized in the chart below: ACTION WRITE TO PORT WRITE DATA single>>double 37EC (H) FF (H) double>>single 37EC FE 5.25">>8" 37EE C0 8">>5.25" 37EE A0 wait logic>"on" 37EE E0 wait logic>"off" 37EE C0 Whenever any switching is done the floppy controller which is NOW enabled is iitialized and all the internal registers restored.Refer to the data sheets supplied in the back of this section for programming information concerning the floppy controller IC's.Although the "wait" logic need not be invoked for single density operation for 8" drives at the 1.77mhz CPU speed an explanation of it's operation follows- 1. The wait state logic is turned on 2. The floppy controller is initialized and the registers set 3. The command is given to floppy controller to read or write 4. The status register is read. This causes the wait state logic to issue a "wait" to the Z80 CPU UNTIL: a. the busy bit in the status register goes false or b. DRQ on the floppy controller chip goes true or c. IRQ on the floppy controller chip goes true If the condition that removed the wait was (a.) or (b.) above then the wait state logic is still "on" but the CPU wait was only removed until the next time the status register of -26-
the floppy controller is read. If the condition that removed the wait was (c.) then the wait state logic is turned "off" . ANALOG PHASE LOCK DATA SEPARATION The VCO -the voltage controlled oscillator a 74LS629 at IC15 generates the 4mhz VCO frequency (2mhz for 5.25" disk drive operation) for the WD1691 the floppy support logic IC(at IC8). In order to guarantee that it is not sensitive to power suupply variations from interface to interface,VR1 (78L05) provides a regulated supply to the 74LS629 and the adjustment controls R25 and R26. The 74LS629 is an improved version of the 74S124 providing excellent immunity to temperature variation and aging. R25 is a multiturn pot to adjust the frequuency range and R26 adjust the bias voltage (for a stable "free running" frequency)for the VCO. The WD1691 and the 74LS629 make up the ANALOG PHASE LOCK LOOP DATA SEPARATION. PRECISION WRITE PRECOMPENSATION The WD2143 provides an accurate write precompensation value according to the adjustment of R24. A negative true pulse of the actual precompensation value can be observed with an oscilloscope at IC8 pin 4. Write precompensation is factory aligned to 200 ns +-25ns and is enabled only for double density operation (all tracks 5.25" and tracks above 43 for 8"). The interface between the WD 2143 and the WD1691 is explained in some detail in the data sheets supplied. Schematics and further details are beyond the scope of this manual. 5/8 SWITCH On powerup or reset, the LNDOUBLER 5/8 switches to 5.25" or 8" drive operation depending on the setting of the 5/8 switch. Since the LNDOUBLER 5/8 always powers up in single density for compatibility reasons,the system disk must always have a single density boot at track 0,sector 0. This applys also to double density 8" system disks.Note that data disks are not required to have single density tracks. -27-
DATA SHEETS The following data sheets are provided for those interested in the technical details concerning the FD1791,WD1691 and the WD2143.The data sheets have been edited to conserve space and we are not distributing the unedited data sheets.The data sheets are reprinted with the permission of WESTERN DIGITAL CORPORATION. Write precompensation is thouroughly discussed as well as the relative performance of the phase lock loop and the rom programmed counter type data separation design techniques. For those interested in more details concerning how to program the floppy controller IC's in your computer ,the following book is recommended: TRS-80 MODEL I DISK INTERFACING by William Barden Jr. available from - 80-US Journal (206) 475-2219 -28-